


Velux Skylights: Maximize Natural Light in Your Attic

Velux Skylights

Natural light has a magical way of transforming spaces, making them feel more inviting and open. However, attics often miss out on this gift, becoming dark and underutilized. Adding skylights to your attic can dramatically change this.

Velux skylights are a great solution for brightening up attics. They flood the space with daylight, making it a pleasant retreat rather than a hidden corner of your home. This increase in natural light helps reduce dependence on artificial lighting, which can lower energy bills and be kinder to the environment.

Beyond utility, natural light from skylights can improve your mood and well-being. It turns the attic into a perfect spot for activities like reading, painting, or even just relaxing. With proper installation and maintenance, Velux skylights seamlessly blend into your roof while providing all these benefits. Whether you have an asphalt shingle or metal roof, Velux options can be suited to meet your home’s needs.

Understanding the Benefits of Velux Skylights

Velux skylights are a fantastic way to transform a dark attic into a bright, usable space. They bring in natural light, which can make the attic feel larger and more welcoming. Natural light helps in creating an airy and vibrant atmosphere, making the attic an enjoyable space for various activities like reading, crafting, or just relaxing.

One of the biggest advantages of installing Velux skylights is the positive impact on energy efficiency. With more daylight streaming into your home, there’s less need to rely on electrical lighting during the day. This means you can save on your energy bills and reduce your carbon footprint. The natural light provided by skylights also helps regulate indoor temperatures, reducing the need for heating in the winter and cooling in the summer.

Natural light has benefits beyond energy savings. Studies show that exposure to daylight can improve mood, enhance productivity, and even boost health. By installing skylights in your attic, you can create a space that not only looks better but also promotes well-being. The attic becomes a sanctuary of sunlight, helping to lift spirits and increase happiness.

Types of Velux Skylights for Attics

When it comes to choosing Velux skylights for your attic, you have several options. Understanding the different models and styles can help you pick the perfect fit for your space.

1. Fixed Skylights: These do not open but are great for letting in light without the need for ventilation. They’re ideal for locations that are hard to reach.

2. Venting Skylights: These can open manually or via electric controls to allow fresh air to circulate. Venting skylights can be a great way to improve attic ventilation and reduce humidity.

3. Solar Skylights: These models use solar power to open and close, which can be an energy-efficient choice. They also often come with remote controls and rain sensors for added convenience.

Velux skylights offer a variety of features to suit different needs:

– Manual Operation: A cost-effective choice where you can easily reach the skylight to open or close it by hand.

– Electric Operation: Perfect for hard-to-reach places, operated by remote, and providing excellent convenience by integrating with smart home systems.

– Durable Materials: Velux uses high-quality materials like laminated glass and aluminum frames for strength and long-lasting performance.

Selecting the right type of skylight depends on your specific needs, the attic layout, and your desired level of convenience. Each type provides unique benefits that can enhance the comfort and functionality of your attic space.

Installation Considerations for Optimal Skylight Performance

Proper installation of Velux skylights is crucial to ensure you get the most out of them. Here are some helpful tips to achieve optimal skylight performance:

1. Placement: For the best natural light, position skylights where they can capture maximum sunlight. East-facing skylights work well for morning light, while those facing west get more afternoon sun. To minimize heat loss during colder months, consider the pitch and angle of the skylight. Proper placement also helps spread light evenly throughout the space.

2. Professional Installation: Hiring a professional to install your skylight is wise. Experienced installers guarantee that the skylight is sealed correctly to prevent leaks and ensure proper insulation. This minimizes the risk of future repairs and maximizes energy efficiency.

3. Integration with Roofing Materials: Velux skylights are compatible with a variety of roofs, including asphalt shingles and metal roofing. Proper integration is key to maintaining the integrity of the roof. Professionals make sure your skylight blends seamlessly, preserving the beauty and functionality of your roof.

By considering these factors, you can enhance the performance of your Velux skylights, ensuring they provide maximum natural light without increasing energy costs or maintenance headaches.

Maintenance Tips to Keep Velux Skylights in Top Condition

To enjoy the benefits of Velux skylights for a long time, regular maintenance is essential. Here’s a simple checklist to help keep your skylights in great shape:

– Regular Cleaning: Clean the skylight glass periodically to keep it clear of debris and dirt, allowing maximum light to pass through. Use a gentle cleaner to avoid scratching the glass surfaces.

– Inspect Seals: Check the seals around your skylights annually to ensure they are intact and not letting in air or water. Replace any worn-out seals promptly.

– Gutter Check: Clear any leaves or debris from the gutters around your skylights. This prevents water from pooling, which could lead to leaks over time.

– Visual Inspection: Look for signs of damage like cracks or warping. Quick fixes can prevent bigger problems.

For repairs that go beyond basic cleaning and inspection, such as fixing cracked glass or addressing water leaks, it’s best to seek professional help. Regular attention keeps Velux skylights functioning effectively and extends their lifespan.

Conclusion

Velux skylights prove to be a wonderful addition to any attic, offering natural light that enhances the space’s utility and appeal. With a variety of types to choose from and proper installation, these skylights can transform any attic into a bright, inviting area. Maintenance plays a key role in ensuring they continue to perform well over time. Whether you’re looking to cut energy costs or improve the ambiance of your home, Velux skylights provide an excellent solution.

Turn your attic into a luminous retreat with help from J. Carnes & Son Roofing. Our team of skylight installers is ready to guide you through selecting and installing the perfect Velux skylights for your home. Let natural light brighten your space and boost your home’s energy efficiency. Contact J. Carnes & Son Roofing today to begin your skylight transformation!

How to Prevent Gutter Clogs with Leaf Guards

leaf guards

Rain gutters are essential parts of any home, channeling water away from the roof and foundation. Without them, rain can cause serious damage, including basement flooding and weakened walls. However, gutters can become clogged with leaves and debris, leading to water overflow and damage.

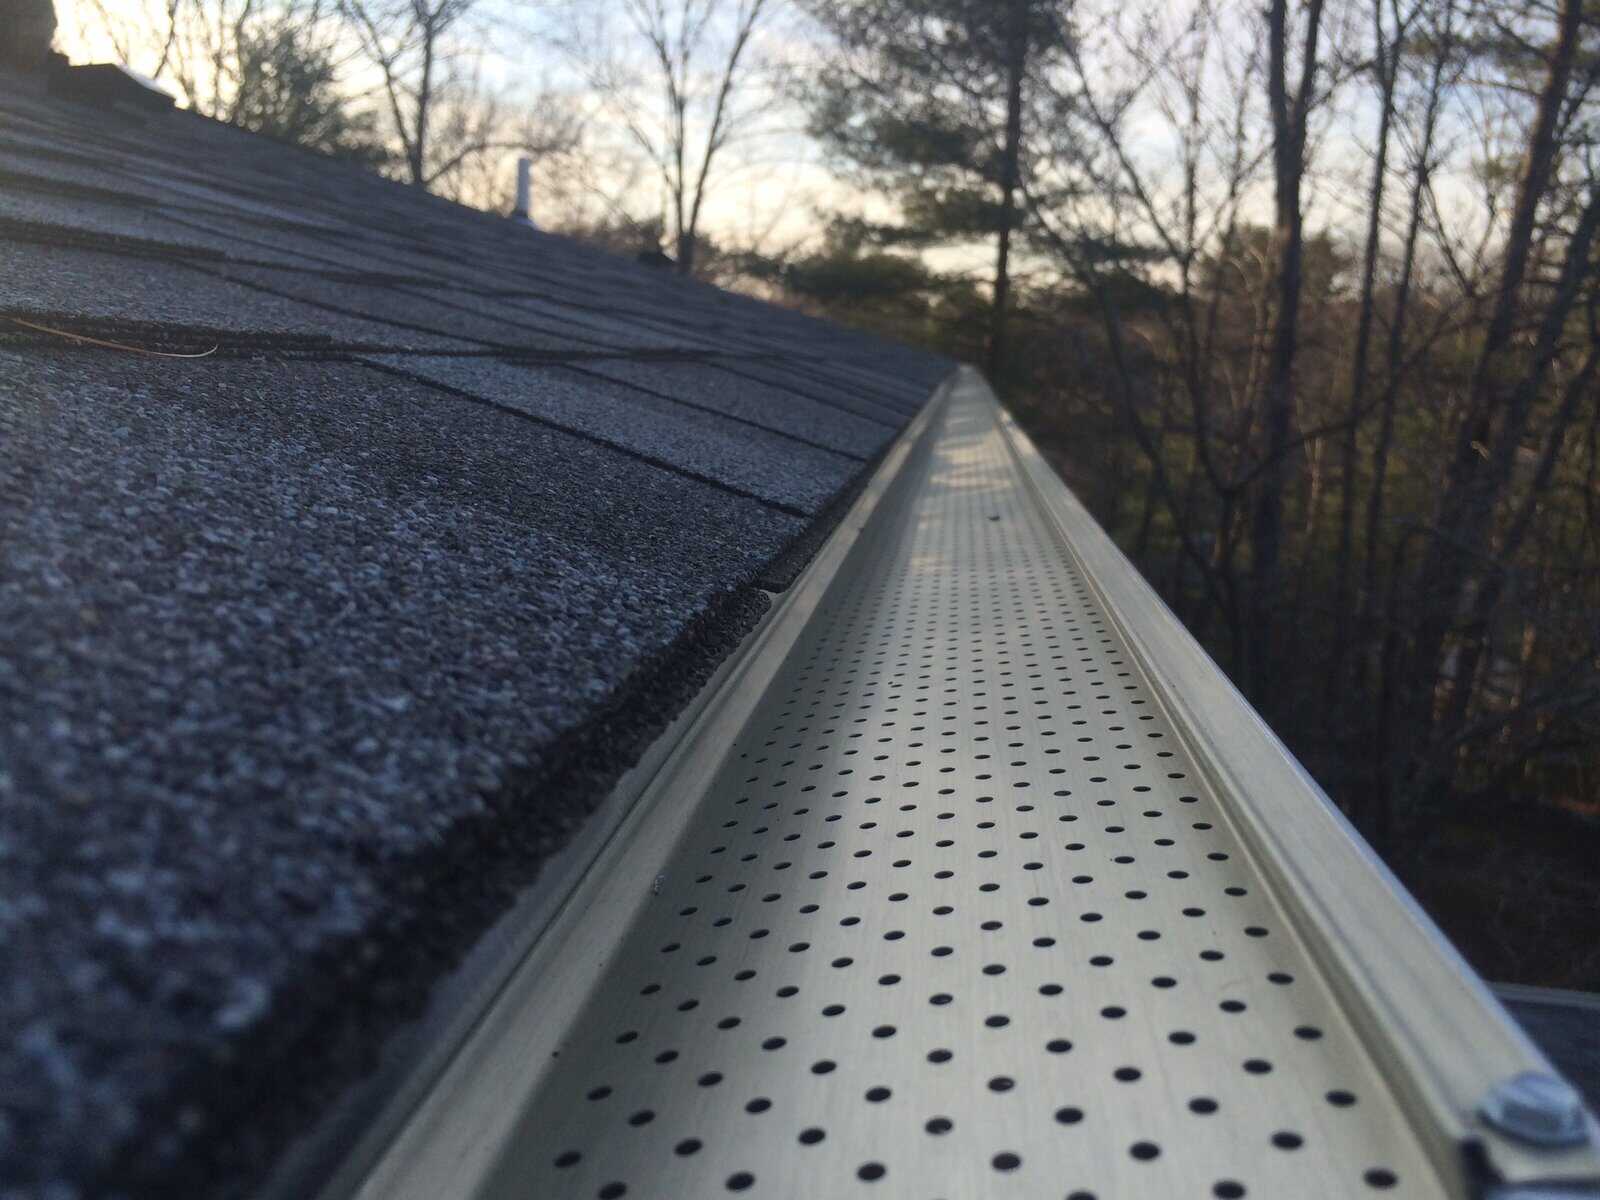
This is where leaf guards come into play. Leaf guards are innovative tools that prevent debris from entering gutters, keeping them clear and functional. By blocking leaves and allowing water to flow freely, leaf guards minimize maintenance and protect your home year-round. Knowing how leaf guards work and choosing the right one can make all the difference in safeguarding your property.

Understanding the Importance of Gutter Maintenance

Gutters play a crucial role in safeguarding your home from water damage. They direct rainwater away from the roof and house foundation, preventing issues like erosion, basement flooding, and mold growth. Without properly functioning gutters, water can pool around the base of your home, causing structural damage over time.

Clogged gutters are a common problem that arises when leaves, twigs, and other debris accumulate and block water flow. This blockage can cause gutters to overflow, leading to water damage on roofing, siding, and even interior walls. If left unattended, clogged gutters can also become heavy and pull away, damaging the fascia and reducing the gutter’s effectiveness.

Regular gutter maintenance helps mitigate these problems. By cleaning and inspecting gutters several times a year, you ensure water flows correctly and away from your home. This routine care can prevent costly repairs and prolong the life of your gutters. Regular maintenance not only protects your home’s structure but can enhance its curb appeal too, by keeping the exterior looking neat and clean.

How Leaf Guards Work: A Closer Look

Leaf guards are an efficient solution for minimizing gutter blockages. They function by covering the gutter opening, allowing water to enter while keeping debris out. This simple yet effective mechanism ensures your gutters function smoothly even during heavy rainfalls.

There are several types of leaf guards available, each with varying levels of effectiveness:

– Screen Guards: These are metal or plastic meshes that block large debris but allow smaller particles and water through.

– Reverse Curve Guards: Designed to direct water into the gutter while debris slides off, these are highly effective but may require more maintenance.

– Micro-Mesh Guards: Offering the highest level of filtration, micro-mesh guards keep out even the smallest debris while allowing water through.

– Brush Guards: These have a bristled texture to trap debris while letting water pass, perfect for areas with heavy leaf fall.

Leaf guards are typically made from materials like aluminum, steel, plastic, or foam. Each material has its pros and cons. For instance, aluminum is lightweight and rust-resistant, while steel provides strength and longevity. The choice of material matters based on your local climate and the amount of debris your home typically encounters.

Understanding how leaf guards function and choosing the right type and material for your home can greatly reduce gutter maintenance efforts and protect your property effectively.

Choosing the Right Leaf Guard for Your Home

Selecting the best leaf guard for your home involves considering key factors that align with your specific needs and environment. Use this checklist to help guide your decision:

1. Roof Type: Identify the style and slope of your roof. Some leaf guards work better with particular roof types, especially those with steep pitches or unique architectural designs.

2. Environment: Consider the amount of debris your property faces annually. If your house is surrounded by many trees, opt for a micro-mesh guard for maximum protection.

3. Material Preference: Decide on the material—aluminum, plastic, or steel—based on local weather conditions and durability requirements.

4. Sizing and Fit: Ensure the leaf guards fit your gutters properly. Standard K-style rain gutters often require different guards than other types, so verify compatibility.

5. Installation Requirements: Determine if you prefer a DIY installation or professional help. Some leaf guards are easy to install, while others might need expert handling.

6. Affordability: Compare costs while considering long-term savings from reduced maintenance and extended gutter lifespan.

Seeking advice from professionals is beneficial. They can offer insights and recommendations tailored to your home, ensuring effective and long-lasting leaf guard solutions.

Installation Tips and Best Practices

Proper installation of leaf guards is key to their effectiveness. Follow these steps and tips for successful installation:

1. Gather Tools and Materials: Ensure you have the necessary tools such as a ladder, gloves, screwdriver, and measuring tape. Have the leaf guard system ready before beginning.

2. Safety First: Always follow safety protocols. Secure the ladder on stable ground and use safety goggles if required.

3. Clean the Gutters: Before installing, clean your gutters thoroughly to remove existing debris and make installation smoother.

4. Position and Attach Leaf Guards: Start from one end and work systematically to the other. Follow manufacturer instructions for attaching the guards securely to avoid any gaps that could let debris through.

5. Check for Secure Fitting: Ensure the guards are snugly fitted so they won’t come loose during storms or heavy winds.

Common mistakes to avoid include skimping on safety, not cleaning the gutters beforehand, and misfitting the guards. Post-installation, check the system periodically, especially after heavy weather, to ensure they remain in place and functioning.

Maintenance tips include regular checks for any debris buildup and cleaning any possible obstructions promptly. While leaf guards significantly reduce gutter cleanings, they still need occasional maintenance to maintain peak efficiency.

Conclusion

Leaf guards provide an efficient solution to the common problem of clogged gutters. By selecting the right type and material, you significantly reduce maintenance needs and extend the health of your gutters. Whether you’re looking for DIY options or considering professional installation, understanding the principles and best practices ensures you get the most out of your investment.

J. Carnes & Son Roofing is ready to assist you in finding the perfect leaf guard solution that matches your home’s needs. By partnering with us, you can ensure proper installation and continued support to keep your gutter system working flawlessly. Contact us today to learn how we can protect your home with the best roofing and gutter solutions available.