Benefits of Installing Velux Skylights in New Hampshire’s Winters

Skylights

Few home improvements can transform your living space as dramatically and beautifully as the installation of skylights. Being a leading residential roofing contractor in New Hampshire, J. Carnes & Son Roofing is keen to bring our wealth of knowledge and expertise to homeowners seeking to elevate their property’s aesthetics and functionality. One of our most popular solutions is the installation of Velux skylights.

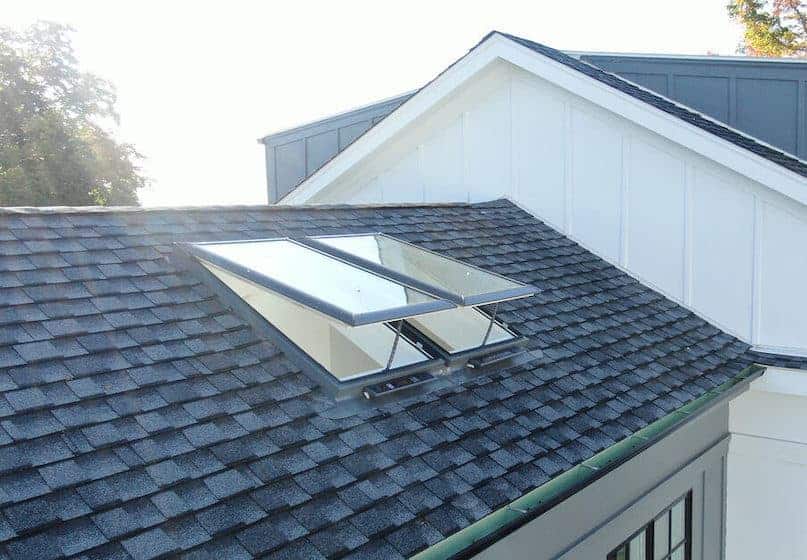
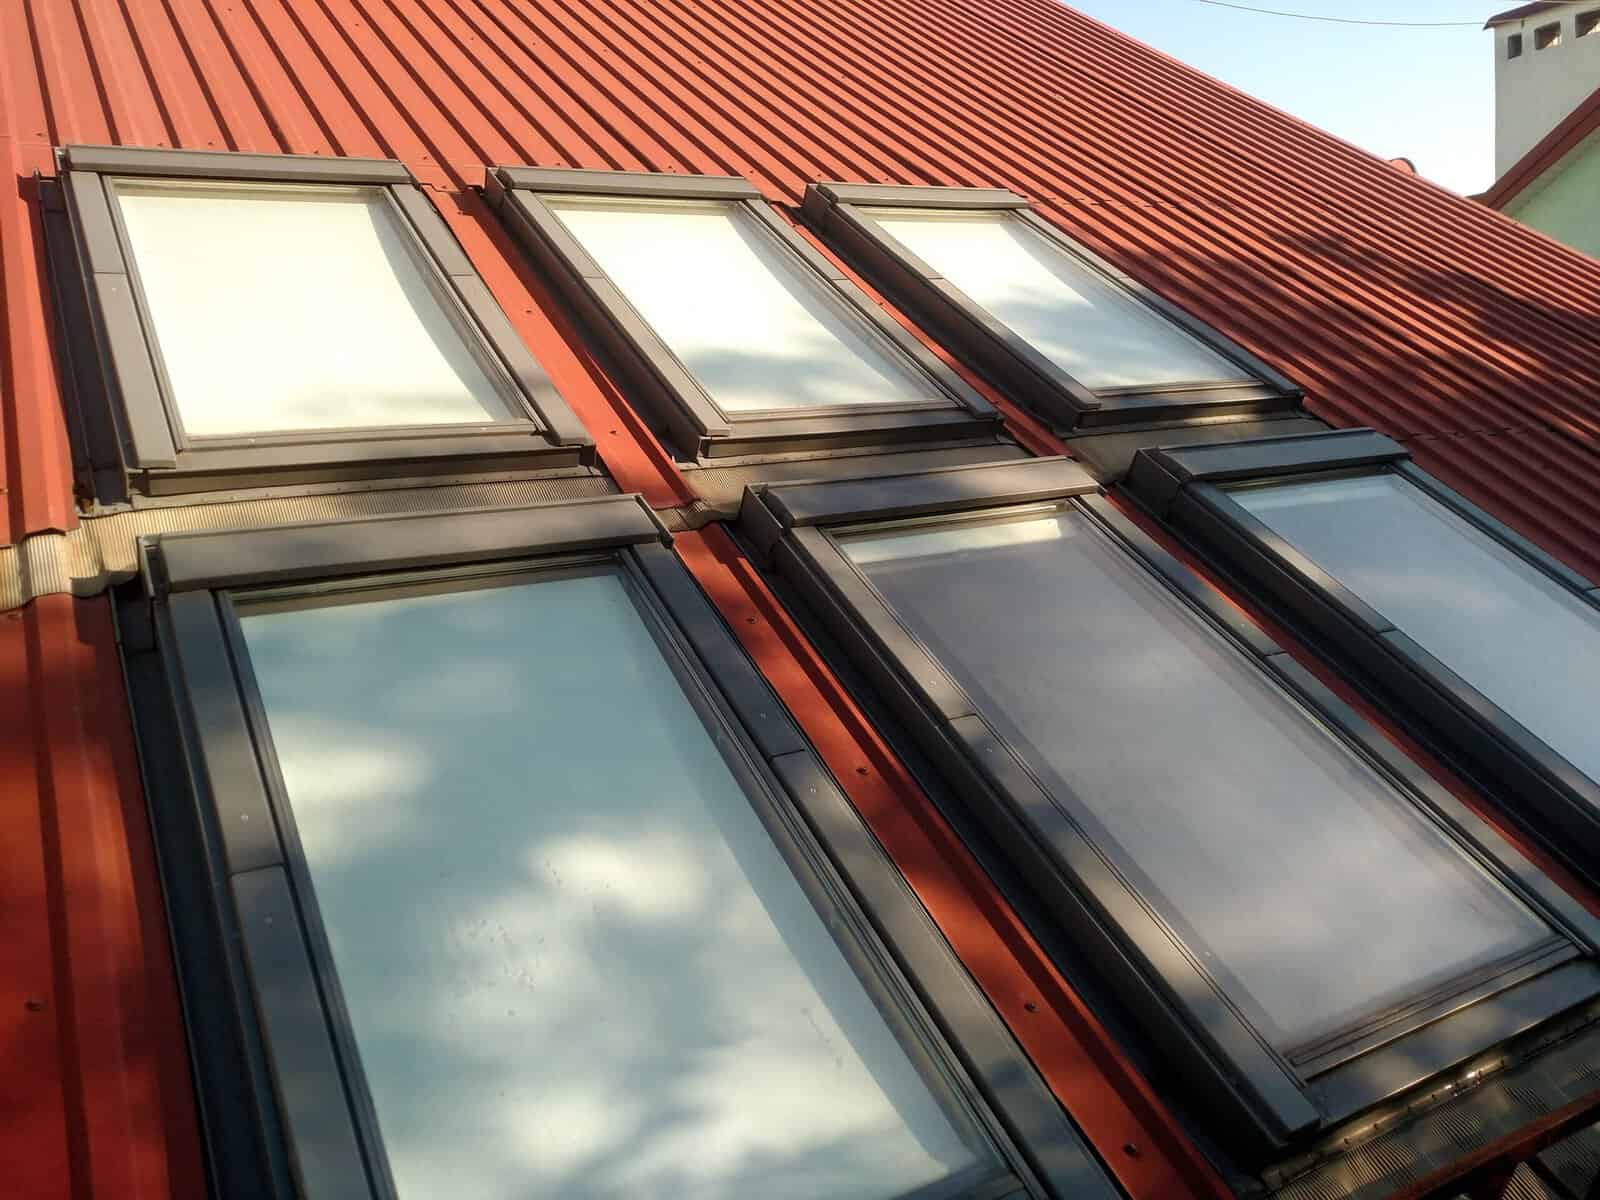
Velux, a reputable name in the skylight industry, offers a wide range of high-quality, energy-efficient skylights that can be installed on various types of roofs. They come in different styles and sizes, providing excellent versatility for homeowners looking to enhance the natural lighting conditions of their homes and connect the indoors with the outdoors.

Benefits of Installing Velux Skylights in New Hampshire’s Winters

The introduction of Velux skylights into your home offers numerous benefits. Apart from bringing in an abundance of natural light and creating an illusion of more space, they also bring several other unique advantages, such as:

  • Health benefits: Research indicates that more exposure to natural light can boost mood, improve sleep, and increase productivity. With Velux skylights, you can enjoy these health benefits while in the comfort of your home.
  • Energy efficiency: Velux skylights are designed to improve your home’s insulation and ventilate naturally, which can decrease your energy costs. The natural daylight they bring in can also significantly reduce the need for artificial lighting during the day.
  • Improved home ventilation: Select models of Velux skylights can be opened, allowing fresh air to circulate through the rooms and improving ventilation. This feature can be especially beneficial in rooms like kitchens and bathrooms, where fresh air movement is key.
  • Aesthetic appeal: Velux skylights add a unique architectural element to your home, enhancing its overall aesthetic. They can provide stunning views of the sky and create beautiful light patterns, adding a sophisticated and modern touch to your home’s interior.

As the trusted partner for homeowners in New Hampshire, J. Carnes & Son Roofing is fully equipped to guide you through the process of integrating Velux skylights into your home. From product selection to professional installation, our team of roofing experts is ready to illuminate your living spaces with an architectural solution that is both beautiful and practical. Contact us today to discover the incredible difference Velux skylights can make to your home.

Selecting the Perfect Velux Skylight for Your Home

Choosing the ideal Velux skylight for your home is an important decision, as it will have a long-lasting impact on your home’s aesthetic and ambiance. There are several factors to consider when making this selection:

1. Skylight type: Velux offers various skylight types, including fixed skylights, manual venting skylights, and solar-powered venting skylights. Fixed skylights do not open, creating a dependable, maintenance-free option for aesthetic appeal and natural light. Manual venting skylights can be hand-cranked or operated via a control rod, while solar-powered skylights open and close using a solar-powered battery and remote control.

2. Placement and positioning: Consider the room where your Velux skylight will be installed and how the sun’s rays will enter at different times of the day. Proper placement can ensure optimal natural light and avoid excessive heat gain during the warmer months.

3. Glass or acrylic: Velux skylights are available in both glass and acrylic materials. High-quality laminated glass provides ultimate protection and improved energy efficiency. Acrylic skylights are lightweight, more affordable, and ideal for out-of-reach areas.

4. Custom options: Velux skylights come in various colors, shapes, and sizes, allowing you to create a custom design that complements your home’s architectural style and personal preference.

Professional Velux Skylight Installation by J. Carnes & Son Roofing

J. Carnes & Son Roofing’s team of experts is dedicated to providing professional Velux skylight installation that guarantees the exquisite blend of functional and aesthetic appeal. The installation process includes:

1. Assessment and consultation: Our team will assess your home’s existing roof and interior framework, recommending ideal skylight products and installation methods.

2. Roof and interior preparation: Prior to installation, we will carefully prepare the area, including any necessary roof deck reinforcement or interior drywall modifications.

3. Skylight installation: Our professionals will meticulously install your chosen Velux skylight, ensuring proper alignment, a watertight seal, and seamless integration into your home’s design.

4. Final inspection: We will conduct a thorough final inspection to ensure your skylight’s performance, functionality, and impeccable aesthetics.

Maintaining Your Velux Skylight for Longevity and Optimal Performance

Velux skylights are engineered for durability and low maintenance; however, proper upkeep is essential for maximizing their life and performance. Follow these maintenance tips to keep your skylight looking and functioning at its best:

1. Inspect the skylight regularly: Check for any signs of wear and tear, such as cracked seals, loose hardware, or condensation accumulation.

2. Clean the glass or acrylic surface: Periodically clean the exterior and interior surfaces of your skylight, removing dirt, debris, and potential algae growth. Using a soft cloth and gentle cleanser is recommended to avoid scratching the surface.

3. Lubricate moving parts: If your skylight is a manual or solar-powered venting model, lubricate the hinges and moving components as needed, using a silicone-based lubricant to ensure smooth operation.

4. Check for debris buildup: Keep the area surrounding your skylight free of debris, such as leaves and branches, to minimize the potential for water pooling or damage.

Exploring Velux Skylight Accessories

Velux offers an extensive range of complementary skylight accessories designed to enhance both appearance and functionality. Some popular options include:

1. Blinds and shades: Velux blinds and shades are specially designed to fit Velux skylights. They can provide light control, temperature regulation, and even energy efficiency benefits. Choose from an array of styles, such as blackout, light-filtering, or Venetian blinds.

2. Insect screens: Keep insects out of your home while enjoying the fresh air with custom-fitted insect screens for venting skylights. Their easy installation and removal make it simple to maintain a bug-free environment.

3. Control rods and remotes: Operate your manual venting skylight with ease using a control rod or upgrade to a remote control system for added convenience.

Why Your Southern Maine Home Needs a Velux Skylight

Velux skylights offer unparalleled benefits to homeowners in New Hampshire. By partnering with our roofing contractors in New Hampshire from J. Carnes & Son Roofing, you can ensure the right skylight choice, professional installation, and comprehensive guidance to enhance your home’s comfort, beauty, and energy efficiency. Start exploring the world of Velux skylights today, and experience a brighter, more vibrant living space that you and your family will cherish for years to come.

Illuminate Your Home with Velux Skylights: Benefits, Installation, and Maintenance

velux skylight

Natural light plays a vital role in creating comfortable, inviting, and energy-efficient living spaces. One of the most effective ways to introduce more daylight into your home is through the integration of skylights in your roof.

Choosing Velux Skylights for your home offers numerous benefits that go beyond merely introducing natural light. These superior skylight products are designed to increase energy efficiency, improve ventilation, and blend seamlessly into any architectural style. Velux offers a wide array of skylight options, including fixed skylights, solar-powered fresh air skylights, and manual venting skylights. This variety ensures homeowners can find the perfect solution to suit their specific needs and preferences.

By selecting Velux Skylights, homeowners can expect:

1. Enhanced Natural Lighting: Velux Skylights flood your home with natural light, creating a more welcoming environment and reducing the need for artificial lighting during daylight hours.

2. Improved Energy Efficiency: With options like solar-powered skylights and energy-efficient glass construction, Velux products minimize heat loss in the winter and heat gain in the summer. Plus, depending on the model, they offer Energy Star certification.

3. Increased Ventilation: Venting skylight models provide an ample supply of fresh air, improving indoor air quality and reducing humidity and condensation levels. This feature is particularly beneficial in spaces like kitchens and bathrooms where moisture is more prevalent.

4. Aesthetically Pleasing Design: Velux Skylights are designed to match and complement various architectural styles, seamlessly blending with your home’s design without overshadowing or clashing with existing elements.

Selecting the Right Velux Skylight for Your Home

Understanding the various Velux Skylight options can help you make an informed decision when selecting the best skylight solution for your home. Here are the main types available and their unique advantages:

1. Fixed Skylights: Ideal for areas where additional ventilation isn’t required, fixed skylights provide ample natural light and excellent energy efficiency, making them a suitable choice for living rooms, home offices, and bedrooms.

2. Manual Venting Skylights: Perfect for rooms requiring extra ventilation, manual venting skylights can be opened and closed using a hand crank or control rod, allowing for fresh air circulation and moisture reduction.

3. Solar-Powered Fresh Air Skylights: Combining natural light and energy efficiency, solar-powered fresh air skylights utilize an integrated solar panel to power their venting mechanism, enabling homeowners to enjoy improved air circulation without increasing their energy bills.

By assessing your home’s specific lighting, ventilation, and energy efficiency needs, you can identify the most suitable Velux Skylight option for each room or space.

Professional Velux Skylight Installation

To ensure optimal performance, longevity, and weather resistance, expert Velux Skylight installation is essential. JCarnes Roofing’s skilled team follows best practices to provide exceptional installation services that maintain the integrity of your roofing system:

1. Structural Assessment: We begin by carefully assessing your home’s existing roof structure to determine the best location and size for your new Velux Skylights, taking into account factors such as joist spacing and roof pitch.

2. Framing and Waterproofing: Our team carefully constructs a framed opening in your roof and installs weatherproofing measures like underlayment, ice and water shield, and flashing to prevent leaks and water infiltration.

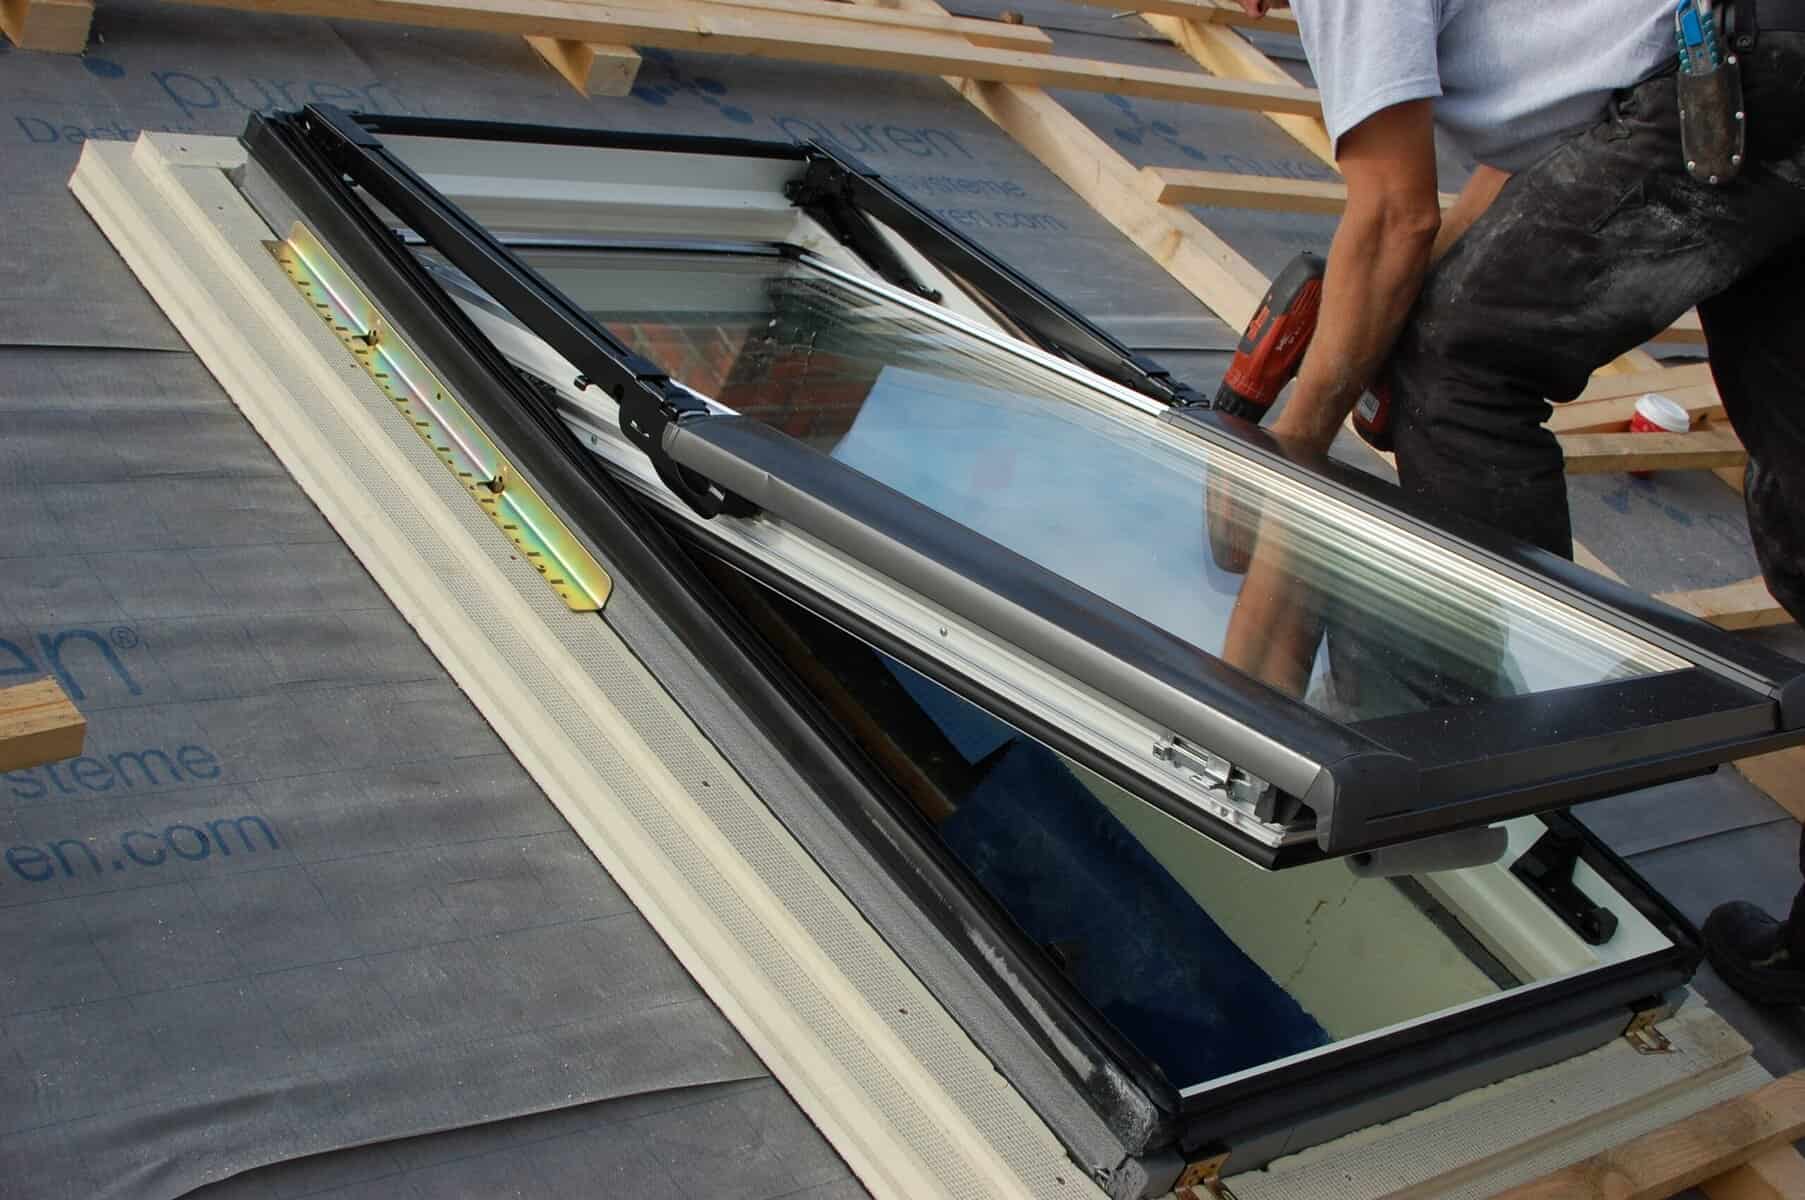
3. Skylight Installation: We expertly place the Velux Skylight within the framed opening, ensuring tight, secure connections and proper alignment. This meticulous approach guarantees a weathertight seal and lasting durability.

4. Interior Finish Work: Completing your skylight installation, our team installs a light shaft leading from the skylight to your room’s interior. Finished with drywall, paint, or trim, this light shaft enhances the visual appeal, integrating the skylight seamlessly into your living space.

Maintaining Your Velux Skylights

Proper maintenance allows Velux Skylights to provide lasting enjoyment, performance, and longevity. Regular upkeep and attention to signs of potential issues can help ensure your investment’s durability and effectiveness. Here are some essential maintenance tips:

1. Clean the Glass: Periodically clean your skylight’s glass to maintain its clarity and maximize light transmission. Use mild soap, water, and a non-abrasive cloth or sponge for best results.

2. Inspect Seals and Flashing: Regularly check the seals and flashing around your Velux Skylights for signs of wear, damage, or leaks, addressing any concerns promptly to prevent water infiltration.

3. Lubricate Moving Parts: For venting models, ensure the smooth operation of any moving parts, such as hinges and cranks, by periodically applying lubricant as needed.

4. Assess Weather Stripping: Inspect your skylight’s weather stripping for cracking or deterioration, replacing it as necessary to maintain energy efficiency and a weathertight seal.

Maximizing Skylight Performance with Velux Accessories

Velux offers a variety of accessories designed to enhance skylight functionality and improve user experience. Consider incorporating these optional features to further customize and optimize your Velux Skylights:

1. Blinds: Velux blinds, available in black-out, light-filtering, and venetian styles, allow you to control the amount of light entering your space and offer added insulation for improved energy efficiency.

2. Insect Screens: For venting models, installing insect screens can help keep unwanted pests out while still allowing fresh air inside.

3. Remote Controls: For hard-to-reach skylights, consider upgrading to a remote control system, allowing you to open, close, and adjust blinds from the convenience of your smartphone or tablet.

4. Glazing Options: Velux offers various glazing options for their skylights, such as laminated glass for added safety or Low-E coatings for enhanced energy efficiency.

Conclusion

Velux Skylights represent a wise investment for New Hampshire and Southern Maine homeowners looking to enhance their living spaces with natural light, improved energy efficiency, and better ventilation. By partnering with a professional roofing company for your Velux Skylight installation and maintenance, you can ensure that your home will benefit from the beauty, comfort, and sustainability provided by these exceptional products for years to come.

As the leading residential roofing contractor in New Hampshire and Southern Maine, JCarnes Roofing understands the value and transformative power of incorporating skylights into a home’s design. We are committed to providing professional guidance and top-quality services to homeowners interested in enhancing their living spaces with Velux Skylights. Our skilled team understands the requirements for proper skylight installation and maintenance, ensuring optimal performance and longevity. Let us help you bring more natural light into your home and improve your quality of life with skylights! Contact us today to schedule a consultation!

Enhance Your Home: A Comprehensive Guide to K-Style Rain Gutters

Enhance Your Home

K-style rain gutters are quickly becoming one of the most popular choices for homeowners looking to improve their home’s curb appeal and protect its foundation from water damage. Also known as Ogee gutters, these gutters are a popular choice among homeowners for their unique combination of durability, cost-effectiveness, and attractive design. Their versatile design allows for seamless integration into your home’s existing architecture, enhancing its overall aesthetics.

But do you know why these gutters are so advantageous? In this comprehensive guide, we will look at the design, installation process, maintenance, and customization options available for K-style rain gutters, explaining why they are the ideal choice for your home in New Hampshire and Southern Maine.

Efficient Design of K-Style Gutters

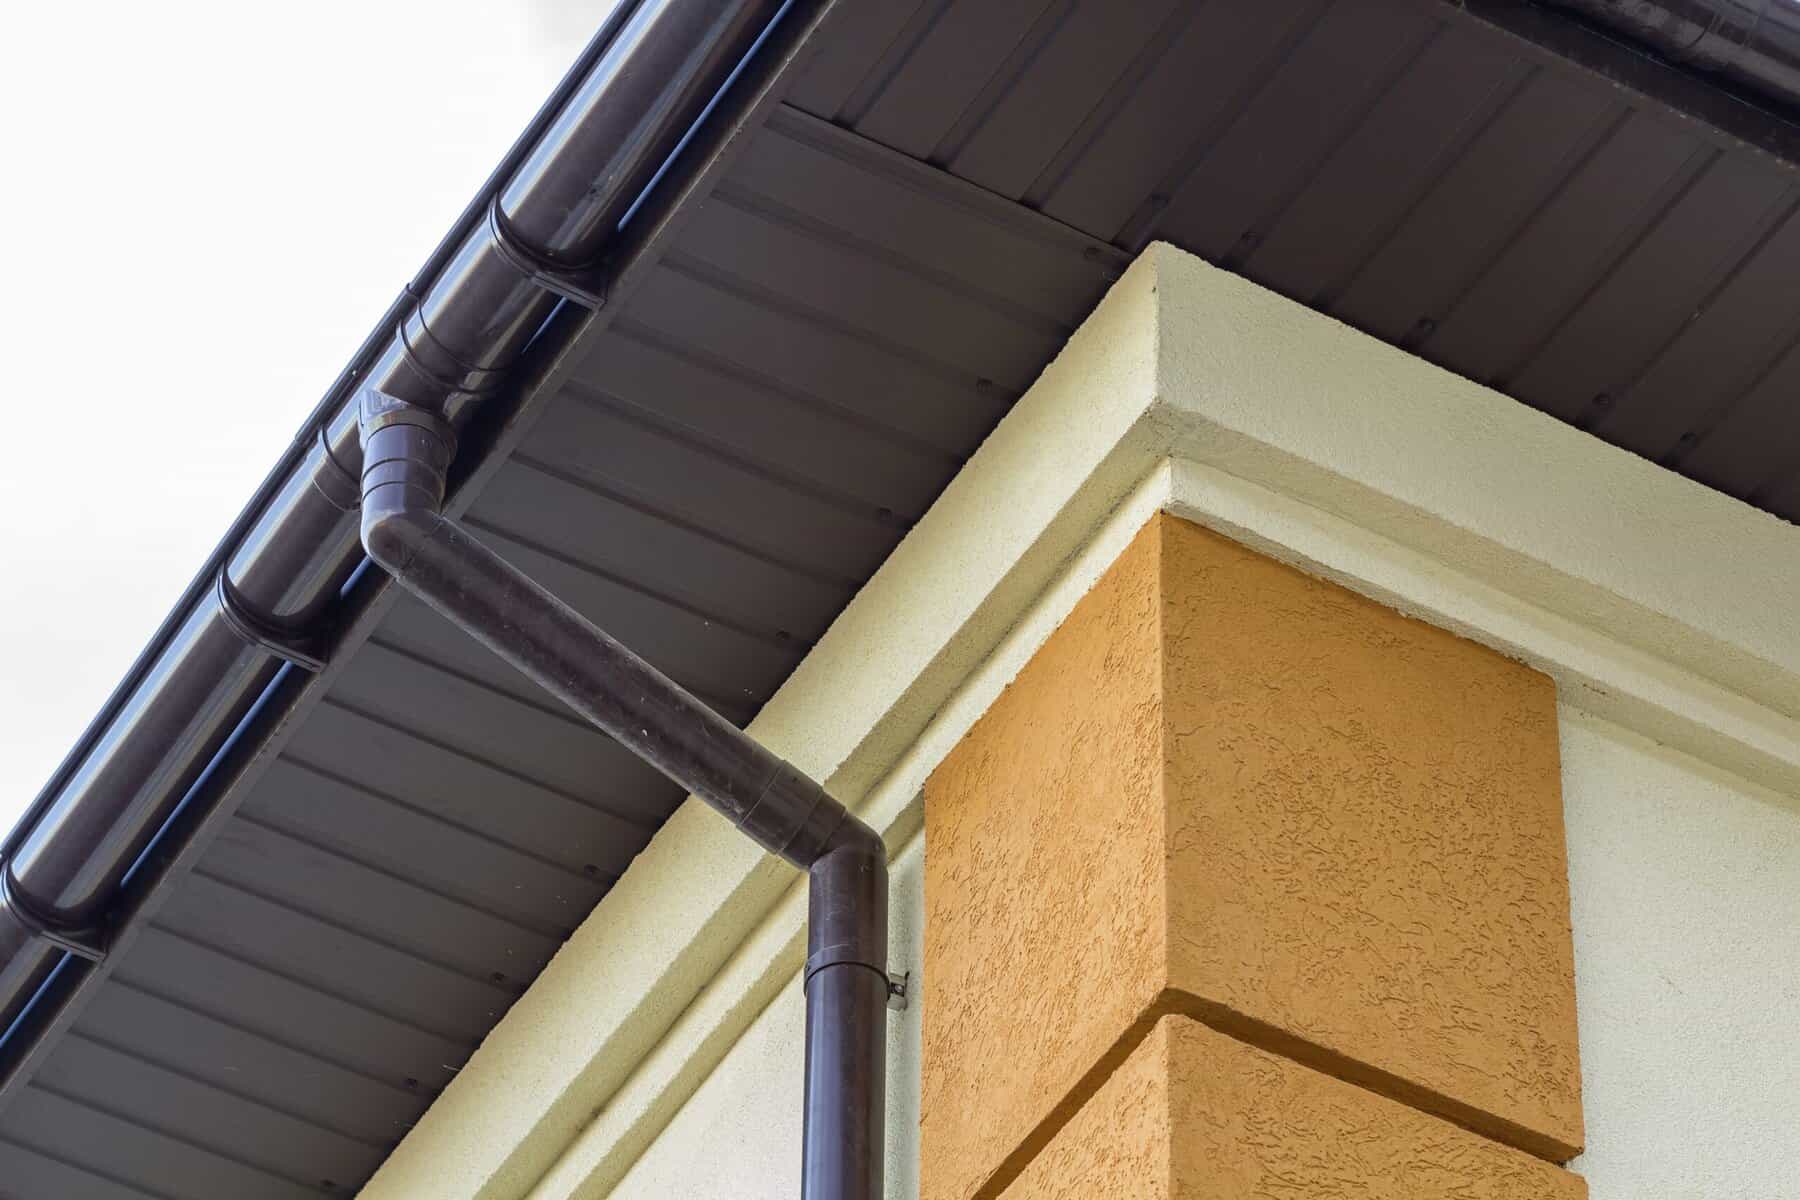
K-style gutters boast a unique design that offers superior performance. Their efficient design consists of:

1. A flat back, which allows for a seamless fit against your home’s fascia board.

2. A flat bottom, which provides extra stability and prevents sagging.

3. A curved, decorative front that mimics the appearance of crown molding and adds considerable aesthetic appeal to your home’s exterior.

In addition to these features, K-style gutters have a larger water-carrying capacity than half-round gutters. This means they can handle more significant volumes of rainwater and cope with heavy downpours without overflowing. Overall, their design provides homeowners with an effective and aesthetically pleasing solution for managing rainwater and safeguarding properties.

K-Style Gutter Installation Process

When it comes to installing K-style rain gutters, trust the professionals like those at J. Carnes & Son Roofing. Our team has the knowledge, experience, and tools necessary to ensure a seamless installation that meets the highest industry standards. The installation process involves the following steps:

1. Assessment and Measurement: Our experts will analyze your home’s roofline and determine the specific requirements for your gutter system. This includes accurately measuring the lengths of gutter needed and identifying the appropriate downspout locations for effective water drainage.

2. Gutter Section Creation: Each K-style gutter section is custom-made to fit the exact measurements of your home, ensuring a seamless and secure fit.

3. Installation: Our team will carefully attach the gutter sections to your home using hidden hangers that are screwed into the fascia board. This method of attachment offers excellent stability and preserves the aesthetic appearance of the gutter system.

4. Downspout Installation: Finally, we’ll install downspouts and any necessary elbow joints at predetermined locations to ensure proper water flow away from your home.

By trusting our team at J. Carnes & Son Roofing with your K-style rain gutter installation, you can expect a long-lasting, leak-free solution that protects your property from water damage for years to come.

Maintaining Your K-Style Rain Gutters

Although K-style rain gutters are designed to minimize debris accumulation and simplify maintenance, it’s still essential to perform occasional upkeep. To keep your gutter system in optimal condition, follow these maintenance tips:

1. Inspect your gutters regularly, especially after storms or during periods of heavy rainfall. Look for any signs of damage, loosened hangers, or water leaks.

2. Clean your gutters at least twice a year, preferably in the spring and fall. Remove any debris or leaves that may have accumulated, and flush the system with a hose to ensure water flows freely through the downspouts.

3. Check the gutter hangers and brackets for any signs of rust or corrosion, and replace them as needed to ensure a secure fit.

4. Inspect and clean your downspouts and elbow joints to prevent clogs that could cause water to back up and overflow the gutter system.

By adhering to these maintenance practices, you’ll extend the life of your K-style rain gutters and keep your home’s exterior looking its best.

Customizing Your K-Style Gutter System

K-style rain gutters offer an incredible degree of customization, allowing you to create a gutter system that perfectly complements your home’s architectural style and color scheme. When designing your custom K-style gutter system, you can choose from:

1. Material Options: Aluminum, copper, and vinyl are popular material options for K-style gutters, each with their unique advantages and aesthetic appeal. Aluminum gutters, for example, are lightweight, rust-resistant, and available in a wide range of colors. Copper gutters are incredibly durable and offer a distinctive, timeless appearance. Vinyl gutters are low maintenance and resistant to rust and corrosion.

2. Color Choices: With a variety of gutter colors available, you can easily find the perfect hue to match or contrast with your home’s existing design elements. Coordinate your K-style gutters with your existing roof, siding colors, or trim for a cohesive look, or choose a bold, contrasting color to make a statement.

Conclusion

K-style rain gutters are an excellent choice for homeowners looking to enhance their home’s curb appeal and protect its foundation from water damage. Their efficient design, seamless installation process, and low maintenance requirements make them a popular choice among homeowners. Additionally, K-style gutters offer an incredible degree of customization, allowing homeowners to create a gutter system that perfectly complements their home’s architectural style and color scheme. By trusting a professional team like J. Carnes & Son Roofing with your K-style rain gutter installation and adhering to proper maintenance practices, you can expect a long-lasting, leak-free solution that protects your property from water damage for years to come.
At J. Carnes & Son Roofing, we pride ourselves on offering the best gutter installation services and solutions for homeowners in New Hampshire and Southern Maine. Our team of experts can help you explore the benefits of K-style rain gutters and ensure a seamless installation for your home. Let us maximize your home’s functionality and curb appeal. Contact us today to schedule a consultation and take the first step toward a durable, attractive, and efficient gutter solution!

Warning Signs That Your Gutters Need Immediate Attention

Warning Signs That Your Gutters Need Immediate Attention

Gutters are an essential part of any home’s exterior, responsible for directing rainwater and melting snow away from the foundation. Yet, many homeowners don’t pay attention to their gutters until it’s too late, and they’re dealing with costly water damage. What are the warning signs of failing gutters, and why is it crucial to address them promptly? Read on.

Water Damage

One of the most obvious signs of failing gutters is water damage to your home’s exterior. Look for peeling or blistering paint, mildew or mold growth, or rust on your gutters. Water may also seep into your home’s foundation, causing cracks and structural damage. If you notice any of these signs, it’s time to inspect your gutters for damage or clogs.

Sagging or Pulling Away from the House

Gutters that are sagging or pulling away from your home are a clear indication that they’re no longer functioning correctly. This issue is typically caused by a buildup of debris, such as leaves and twigs, that adds too much weight to the gutters. If not addressed, the gutters may detach from your home entirely, causing water to overflow and potentially damage your home’s foundation.

Peeling or Cracking Foundation

Your home’s foundation is crucial for stability and safety. If you notice peeling or cracking in your foundation, it may be due to water damage caused by failing gutters. Water that’s not properly directed away from your home’s foundation can cause soil erosion, leading to cracks and unstable foundation walls. If you notice any signs of foundation damage, it’s essential to inspect your gutters and address any issues promptly.

Mold and Mildew Growth

Mold and mildew thrive in damp, dark environments, making your gutters an ideal breeding ground. If you notice mold or mildew growth on your home’s exterior or gutter system, it’s a sign of excess moisture. This issue can be caused by clogged gutters or inadequate drainage, leading to water damage and potential health hazards. If you notice mold or mildew growth, it’s crucial to address the issue promptly to prevent it from spreading and causing further damage.

Insect Infestations

Insects such as mosquitoes, termites, and ants are attracted to standing water, making clogged or failing gutters a prime location for infestations. Insects can cause damage to your home’s structure, as well as health hazards for you and your family. If you notice an increase in insect activity around your gutters, it’s time to inspect them for damage and clean them out to prevent further issues.

Overflowing Gutters

Overflowing gutters are a clear indication that they’re clogged or not functioning correctly. This issue may be caused by debris buildup or inadequate drainage, leading to water damage and potential foundation issues. If you notice water overflowing from your gutters during a rainstorm, it’s crucial to inspect and clean them out promptly.

Soil Erosion

If you notice that soil is eroding away from your home’s foundation, it may be due to an issue with your gutters. When gutters are clogged or not functioning correctly, water can overflow and erode soil away from your home’s foundation. This can cause significant damage and instability, so it’s essential to address the issue promptly.

Basement Flooding

Basement flooding is a serious issue that can be caused by failing gutters. When gutters are clogged or not functioning correctly, water can seep into your home’s foundation and basement. This can cause significant damage, including mold growth and structural instability. If you notice water in your basement, it’s crucial to inspect your gutters and address any issues promptly.

Gutter Separation

Gutter separation is a clear indication that your gutters are failing. This issue may be caused by damage to the gutters or inadequate installation. When gutters separate, water can overflow and cause significant damage to your home’s exterior and foundation. If you notice gutter separation, it’s essential to have them inspected by a professional and address any issues promptly.

Conclusion

Failing gutters are a serious issue that can lead to costly water damage and potential health hazards. It’s essential to pay attention to the warning signs discussed in this article and address them promptly to protect your home and family. If you’re unsure about the condition of your gutters, it’s always best to have them inspected by a professional to ensure they’re functioning correctly. Don’t wait until it’s too late–protect your home today!

When it comes to your house gutters, trust J. Carnes & Son Roofing. Our mission is to serve the community with qualified, uncompromising workmanship and unparalleled service. We work with dedication and integrity and strive to be a leader in our trade. Call now!

Busting 8 Roof Gutter Myths: What You Need to Know

myths about gutters

Roof gutters are an often overlooked but crucial part of your home’s protection against water damage. They are responsible for directing water away from your home’s foundation and preventing costly damage to your roof, walls, and basement. However, there are several common myths surrounding gutters that can lead to improper installation and maintenance practices. 

In this article, we will debunk these myths and provide accurate information on maintaining and properly protecting your gutters.

Myth 1: Gutters Only Need Cleaning Once a Year

One of the most common myths about gutters is that they only need to be cleaned once a year. However, this is not true. Gutters should be cleaned at least twice a year, preferably in the spring and fall. If trees surround your home, you may need to clean your gutters more frequently to prevent clogs.

Myth 2: Gutter Guards Eliminate the Need for Cleaning

Many homeowners believe that installing gutter guards will eliminate the need to clean their gutters. While gutter guards can help reduce the amount of debris that enters your gutters, they do not eliminate the need for cleaning. Gutter guards can become clogged with leaves, pine needles, and other debris, which can lead to water damage if not removed.

Myth 3: Gutters Should Be Sloped Towards the Downspout

While gutters should be sloped, they should not be sloped towards the downspout. Instead, gutters should be sloped towards the outlet, which is located at the end of the gutter. This ensures that water is properly drained away from your home.

Myth 4: Gutters Only Need to Be Replaced When They Leak

Many homeowners believe that gutters only need to be replaced when they leak. However, this is not true. Gutters can become damaged or worn out over time, even if they do not leak. If your gutters are rusted, dented, or have holes, they may need to be replaced.

Myth 5: All Gutters are the Same

There are several different types of gutters, including aluminum, copper, and vinyl. Each type of gutter has its own advantages and disadvantages, and it is important to choose the right type of gutter for your home and climate.

Myth 6: Gutters Can Be Installed by Anyone

Many homeowners believe that gutters can be installed by anyone. However, installing gutters requires knowledge and experience. Improperly installed gutters can lead to water damage, leaks, and other problems. It is important to hire a professional gutter installer to ensure your gutters are installed and functioning correctly.

Myth 7: Gutters Don’t Need to Be Inspected Unless There’s a Problem

Regular inspections can help identify potential issues before they become major problems. Inspecting your gutters at least once a year can also help ensure that they are functioning properly and prevent costly repairs down the line.

Myth 8: Gutters Are Only Necessary for Areas with Heavy Rainfall

Some homeowners believe that gutters are only necessary in areas with heavy rainfall. However, gutters are essential in all climates. Even in dry climates, gutters can help prevent water damage by directing rainwater away from your home’s foundation. Additionally, gutters can also help protect your landscaping by preventing erosion and water damage.

Conclusion

It’s important to be aware of the common myths surrounding roof gutters to ensure that you’re taking proper care of your home. Regular cleaning and inspection, proper installation, and choosing the right type of gutter for your home and climate are all essential steps in maintaining your gutters. 

Don’t fall for the myths that gutters only need to be cleaned once a year or that they are unnecessary in certain climates. By following the facts and taking care of your gutters, you can protect your home from costly water damage and enjoy peace of mind knowing that your home is well-maintained.

Don’t wait until your gutters become a problem. Contact J. Carnes & Son Roofing today to schedule an appointment for professional gutter cleaning services. Let us help you keep your gutters in top condition and protect your home from water damage. Trust the experts at J. Carnes & Son Roofing for all your roofing needs!

Common Roof Shingle Color Errors That You Should Avoid

IMG 0120 4

Choosing the right color of roof shingles can be a daunting task. A roof is a significant investment, and you want to make sure that it compliments your home’s design and style. However, many homeowners make the mistake of selecting the wrong color, which can result in a less-than-ideal look. Here are some common roof shingle color errors that you should avoid.

1. Choosing Colors That Don’t Compliment Your Home’s Exterior

One of the most common mistakes homeowners make when selecting the color of their roof shingles is not considering the color of their home’s exterior. While you may love the look of a particular color, it may not match the color of your home’s siding or brick. It is crucial to choose a color that complements your home’s exterior rather than clashes with it.

2. Not Considering the Climate

Another mistake that homeowners make is not considering the climate in their area. In areas with hot climates, lighter-colored shingles can help to reflect the sun’s rays, keeping your home cooler. In contrast, darker shingles can absorb heat, making your home hotter. In colder climates, darker shingles can help to absorb the sun’s rays, keeping your home warmer. It is essential to choose a color that will help regulate the temperature of your home and save on energy costs.

3. Choosing a Color That Fades Quickly

Roof shingles are exposed to the sun’s UV rays, which can cause them to fade over time. Choosing a color that fades quickly can result in a roof that looks dull and worn out. It is essential to choose a color that will maintain its vibrancy over time. Some manufacturers offer shingles with built-in UV protection, which can help to prolong the life of your roof’s color.

4. Ignoring the Neighborhood Aesthetics

When selecting the color of your roof shingles, it is also important to consider the aesthetics of your neighborhood. If your home is in an area with strict HOA guidelines, you may be limited in your color options. However, even if there are no specific guidelines, it is still important to choose a color that fits in with the overall aesthetic of the neighborhood. Choosing a color that is too bold or out of place can make your home stand out for the wrong reasons.

5. Not Considering Your Home’s Architectural Style

Your home’s architectural style should also be considered when selecting the color of your roof shingles. A modern home may look great with a bold, contrasting color, while a traditional home may look better with a more subdued color. It is essential to choose a color that complements your home’s architectural style.

6. Choosing a Color Based on Trends

Finally, many homeowners make the mistake of choosing a color based on current trends. While it may be tempting to choose a color that is currently popular, it may not be a timeless choice. Trends come and go, and you want your roof to look great for years to come. It is essential to choose a color that you love, and that will stand the test of time.

Conclusion

Selecting the color of your roof shingles is an important decision that should not be taken lightly. By avoiding these common color errors, you can ensure that your roof looks great and enhances the overall look of your home. Consider the color of your home’s exterior, the climate in your area, the neighborhood aesthetics, and your home’s architectural style, and choose a color that you love. With these tips in mind, you can make the right choice and enjoy a beautiful roof for years to come.

If you are looking for a reliable company that deals with roof shingles in New Hampshire, look no further than our services here at J. Carnes & Son Roofing. We are the leading and most trusted residential roofing contractor in New Hampshire and Southern Maine, and we are here to help you maintain and repair your problematic roof. Call us today and let us tend to your shingles in no time!

6 Signs That Your Roofing Estimate Could Be a Potential Scam

roof

Replacing or repairing a roof constitutes a substantial financial commitment for any individual who owns a residential property. Unfortunately, some unscrupulous contractors exploit this by presenting overpriced and potentially fraudulent roofing estimates.

As a homeowner, it’s essential to be aware of the common warning signs of a roofing estimate scam to avoid falling victim to such schemes. Learn the six indicators that your roofing estimate may be a scam to protect yourself and your investment.

1. Unusually Low Estimate

If a contractor provides you with an unusually low estimate for your roofing project, it may be a warning sign that they are trying to scam you. 

A standard estimate may seem like a great deal, but it could be a tactic used by dishonest contractors to get you to sign a contract. Later, they may add additional costs or change the scope of work to increase the project’s price.

2. Pressure to Sign a Contract Immediately

Exercising prudence is imperative when a roofing contractor attempts to coerce you into promptly signing a contractual agreement. This kind of pressure is a warning sign that the roofing estimate you received might be a possible scam. 

A legitimate roofing contractor will give you reasonable time to review and consider the estimate before deciding. Fraudulent individuals employ coercive sales strategies to elicit consent to their conditions without allowing you to think or compare estimates with other contractors. 

Therefore, taking your time, carefully reading through the estimate, and asking any questions before signing a contract is crucial.

3. No Written Estimate

A written estimate is an essential document that outlines the scope of work, materials used, and the project’s cost. If a contractor does not provide a written estimate, it may be a warning sign that they are trying to scam you. 

Holding contractors accountable for their work and the project’s cost is only possible with a written estimate.

4. Lack of Licensing and Insurance

A reputable roofing contractor should have the licenses and insurance to operate legally and protect themselves and their clients in case of any accidents or damages. If a roofing contractor cannot provide proof, it’s best to avoid them and look for a more trustworthy and reliable option.

Having proper licensing and insurance assures the contractor is qualified and experienced enough to do the job and may not stand behind their work if something goes wrong.

5. No References or Reviews

When getting a roofing estimate, it’s essential to be cautious and do your due diligence. One warning sign that should raise a red flag is if it excludes references or reviews. These proofs are necessary to know whether the company has completed similar projects in the past.

6. Upfront Payment

Reputable roofing contractors generally do not require upfront payments before commencing work on a project. If a contractor asks for payment upfront, it is a red flag that the estimate may be a scam. 

This type of contractor may take the money and never return to do the work, or they may do substandard work and then request additional payment before completing the job. Selecting a reliable roofing contractor is imperative to prevent becoming a target of fraudulent activity. 

Conclusion

Undertaking a roofing project entails a substantial financial commitment, and it is essential to ensure that you hire a reputable contractor. By recognizing the cautionary indicators, you can protect yourself from roofing scams and hire a trustworthy contractor for your home.Are you looking for free estimate roofers? Check out J. Carnes & Son Roofing! We are here to provide top-quality roofing services, from repairs to installations. Don’t let a leaky roof ruin your day – call us now for a free estimate, and let us take care of all your roofing needs!

5 Important Benefits of Using Rubber Roofing for Your Home

Rubber roof

When it comes to roofing, homeowners and builders always look for durable, long-lasting, and eco-friendly materials. One such material is rubber roofing. This material is made from recycled rubber, offering several benefits over traditional roofing materials. Read on to learn more. 

Durability

Rubber roofing is incredibly durable, with a lifespan of up to 50 years. It is made of a single-ply membrane resistant to punctures, tears, and other types of damage. This makes it an ideal roofing material for areas that experience extreme weather conditions.

This type of roofing is also resistant to UV radiation, which can cause other roofing materials to deteriorate over time. This means that rubber roofing will not crack or fade, ensuring it remains in top condition for many years.

Eco-Friendliness

One of the most significant benefits of rubber roofing is its eco-friendliness. Rubber roofing is made from recycled materials which would otherwise end up in landfills. This reduces the amount of waste in landfills and helps protect the environment.

Furthermore, rubber roofing is also recyclable. It can be recycled at the end of its lifespan to create new roofing materials or other products. This means that rubber roofing is a sustainable and eco-friendly option that can help reduce our environmental impact.

Energy Efficiency

Rubber roofing is also an energy-efficient roofing material. It has excellent insulation properties that help to keep homes warm in the winter and cool in the summer. This means homeowners can save money on their energy bills using rubber roofing.

It can also help to reduce the urban heat island effect. This effect occurs when urban areas become significantly warmer than nearby rural areas due to the heat absorption by buildings and pavement. By installing rubber roofing, we can help reduce the amount of heat absorbed by structures, which can help mitigate the urban heat island effect.

Low Maintenance

Rubber roofing requires very little maintenance, saving homeowners time and money. Unlike traditional roofing materials, rubber roofing does not require regular cleaning or treatment to maintain its appearance and performance.

Furthermore, this type of roofing is also resistant to algae and moss growth, which can be problematic with other roofing materials. This means that homeowners do not need to worry about regularly cleaning their roofs to prevent the development of algae or moss.

Lightweight 

Rubber roofing is lightweight compared to traditional roofing materials such as asphalt shingles or concrete tiles. This makes it easier to transport and handle during the installation process. 

Additionally, the lightweight nature of rubber roofing puts less stress on the building’s structure. This can be particularly beneficial for older or weaker structures.

While the upfront cost may be slightly higher than traditional roofing materials, its long lifespan and low maintenance requirements make it a cost-efficient choice. Homeowners can save on repair and replacement costs associated with other roofing materials.

Conclusion

Rubber roofing is a durable, eco-friendly, and energy-efficient material offering several benefits over traditional roofing materials. It is an excellent choice for homeowners and builders looking for a roofing material that is long-lasting, sustainable, and requires little maintenance.

If you’re looking for reliable and experienced rubber roofers in New Hampshire and Southern Maine, turn to J. Carnes & Son Roofing. As the area’s leading and most trusted residential roofing contractor, we have the expertise and experience to install and maintain rubber roofing to the highest standards. Contact us today to get a quote. 

The Lifespan of a Roof: How Often Should You Replace Yours

roofing

The roof is an essential component of a house. It protects the house from external elements such as rain, snow, hail, and the sun. A well-maintained roof will last for years, but eventually, it will need to be replaced. However, the question is, how often should a roof be replaced? This article will explore the factors that determine a roof’s lifespan, signs that indicate it’s time to replace the roof and the benefits of replacing a roof.

Signs that Indicate it’s Time to Replace the Roof

1. Age of the Roof

The age of your roof is one of the most crucial factors to consider when deciding if it’s time to replace it. Most roofs have a lifespan of 20-25 years, and after that, they start to deteriorate, making them less effective in protecting your home. If your roof is approaching or has exceeded its expected lifespan, it’s time to start planning for a replacement.

2. Missing or Damaged Shingles

Shingles are an essential part of any roof. They protect the surface from external elements and provide insulation. However, shingles can become damaged or start to fall off over time. If you notice missing or damaged shingles, it’s a sign that your roof is starting to deteriorate. Replacing shingles may be a temporary solution, but it’s not a long-term fix. It’s best to replace the entire roof to protect your home.

3. Leaks in the Attic

Leaks in your attic are a clear sign that your roof is starting to fail. If you notice water stains or moisture in your attic, it’s a sign that water is penetrating your roof. This can lead to mold growth, rotting wood, and other significant problems. If the damage is extensive, you may need to replace the entire roof.

4. Sagging Roof

A sagging roof clearly indicates something is wrong with your roof’s structure. This can be caused by rotting wood, water damage, or a weak foundation. A sagging roof is a safety hazard and should be addressed immediately. If you notice your roof is sagging, it’s time to replace it.

5. High Energy Bills

If your energy bills are higher than usual, it could be a sign that your roof is no longer providing adequate insulation. As your roof ages, it becomes less effective in keeping your home warm in the winter and cool in the summer. If you notice a sudden increase in your energy bills, it’s time to inspect your roof to determine if it needs replacing.

Understanding When to Replace Your Roof

A roof is an essential component of a house, and knowing when to replace it is essential. Factors that determine a roof’s lifespan include the material used, the quality of installation, and the climate. Signs that indicate it’s time to replace a roof include curling or missing shingles, leaks, and water stains. Benefits of replacing a roof include increased energy efficiency, improved safety, and increased home value. The cost of replacing a roof varies, and maintenance can help extend a roof’s lifespan.

J. Carnes & Son Roofing is a reliable and reputable residential roofing contractor serving New Hampshire and Southern Maine. If you need a roof replacement, contact our team of experts today for top-quality service. We guarantee a durable and long-lasting new roof that will provide optimal protection for your home. Get a quote today!

5 Important Things to Know before Installing a Skylight

skylight

Skylights are windows installed on the roof or ceiling of a building to bring natural light and fresh air into the space. They are popular for their aesthetic appeal, energy efficiency, and health benefits. Skylights come in different styles, sizes, and designs to fit any architectural design or personal preference.

Installing a skylight is a delicate process that requires expertise and precision. It involves cutting a hole in the roof or ceiling, installing the window, and sealing it to prevent water leaks and air infiltration. A poorly installed skylight can lead to costly and dangerous consequences such as water damage, energy loss, and health hazards. For this reason, you must consider several important things to make an informed decision before installing a skylight, such as materials and how it will be done. Beyond that, there are also several things you must know before installing one, such as:

#1 – You Must Consider Your Preferred Features

Skylights have different features, such as fixed, venting, or tubular. Fixed skylights are stationary and do not open, while venting skylights can open to allow ventilation. On the other hand, tubular skylights are small and designed to bring natural light into small spaces such as closets and bathrooms. To this end, you must consider your preferred features based on your needs, location, and budget.

In most cases, venting skylights are ideal for areas that require ventilation, such as kitchens, bathrooms, and attics. On the other hand, fixed and tubular skylights are perfect for rooms that require more natural light, such as living rooms and bedrooms.

#2 – Getting the Skylight’s Fit Must Be Right from the First Time

A skylight must be measured accurately to ensure a proper fit because it will help you determine the appropriate size and shape of the skylight. It is also essential to consider the roof’s pitch and the skylight’s location in the sun’s path because this will affect the amount of light that enters the room.

A skylight’s fit must also be appropriate for the building’s insulation and weatherproofing. This is important to prevent heat loss or gain and to avoid leaks that can cause damage to the interior of the building.

#3 – A Skylight Will Stay Leak-Free Depending on the Materials Used

The materials used to construct a skylight can significantly affect its ability to remain leak-free. High-quality materials, such as tempered or laminated glass and durable seals and flashing, can ensure the skylight remains watertight over time.

For this reason, regularly inspect and maintain the skylight to ensure it remains in good condition and address any potential issues before they become significant problems. Regular cleaning and upkeep can help prevent debris buildup and damage to the skylight, which can lead to leaks and other issues.

#4 – Skylights Are Only as Good as the Location They Are Installed

A skylight is only effective if installed in the right location, so it must be strategically placed to provide maximum natural light without compromising privacy and energy efficiency. For example, skylights should be installed on the south-facing roof to maximize solar heat gain during winter and minimize heat gain during summer.

Additionally, skylights should be installed in areas with minimal shading and obstruction from trees or buildings. This will ensure maximum natural light and minimize the risk of leaks or damage from falling debris.

#5 – Curb-Mounted or Deck-Mounted?

Skylights are generally installed in two ways: curb-mounted and deck-mounted. A curb-mounted skylight is raised above the roof on a wooden or metal frame, creating a curb around the skylight, recommended for roofs with a pitch of less than 14 degrees. On the other hand, a deck-mounted skylight sits flush with the roof surface and is installed directly onto the roof deck, recommended for roofs with a pitch of more than 14 degrees.

The choice between curb-mounted and deck-mounted skylights will depend on the specific requirements of your roof and the type of skylight you choose. For this reason. you must consult a professional installer to determine the best installation method for your skylight.

Conclusion

Skylights are an effective way to bring natural light and ventilation into your home or building. However, they must be installed correctly to ensure their durability and effectiveness, especially since they will be there indefinitely. This way, your skylight will enhance your property’s aesthetic appeal while providing energy-saving benefits.

J. Carnes & Son Roofing provides top-quality services for skylight installation. Our professional contractors will ensure your home gets an aesthetically pleasing yet functional skylight for a fair price. Get a quote from us today!