Solving Wind Damage Problems in New Castle

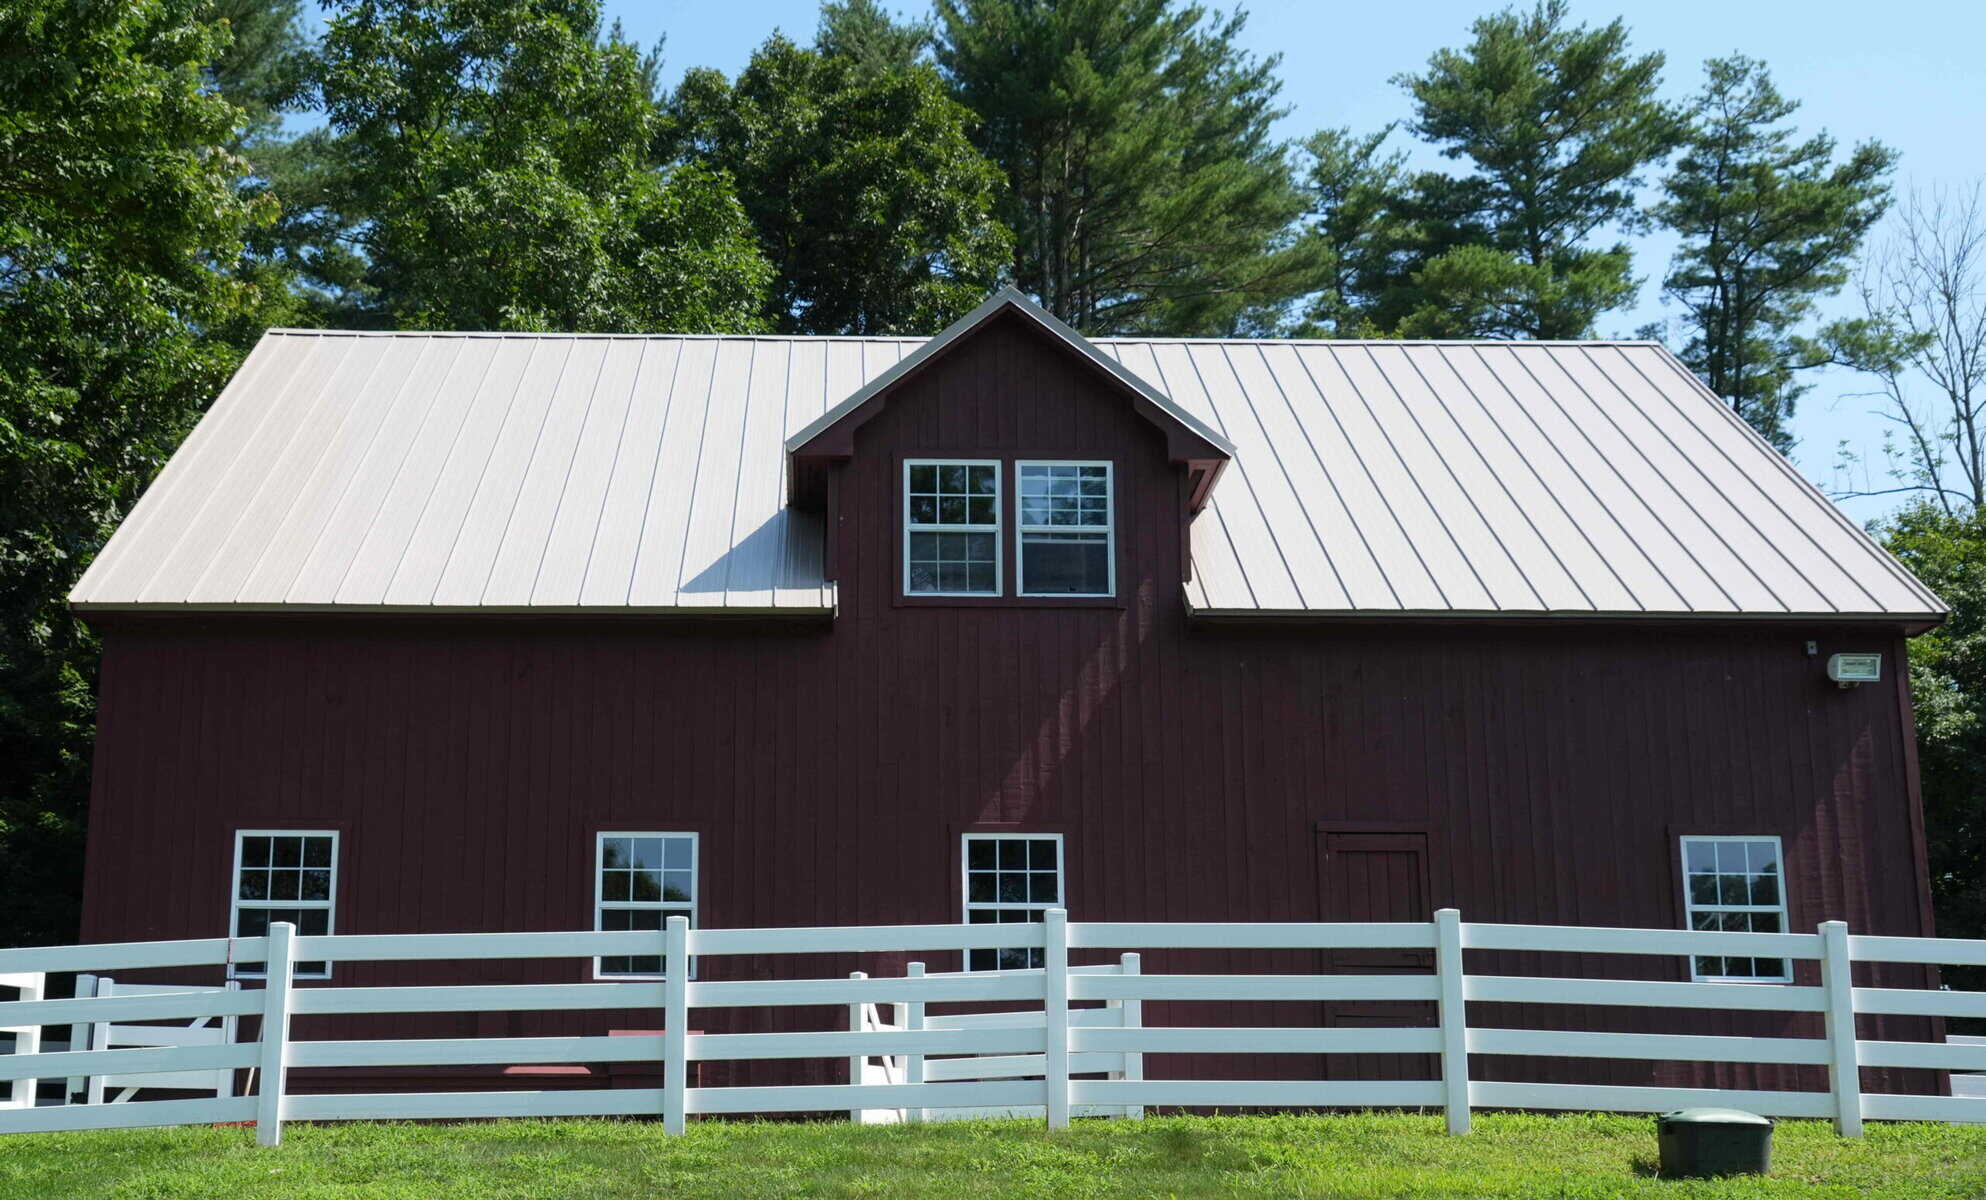
Metal roof on a New Hampshire home by J. Carnes & Son Roofing

Living in New Castle, windstorms are just part of the deal. Strong gusts can sweep in without much warning, and when they do, your roof takes the first hit. These storms can tear off shingles, loosen metal flashing, or toss debris hard enough to cause damage. The problem is, even small damage can grow into something much worse if it’s not handled quickly. Knowing how winds affect your roof and spotting the early signs can stop you from facing more serious and expensive repairs later on.

New Castle homeowners often deal with weather shifts heading into fall. October is when you really start to feel the chill build in the air, and those winds coming up the coast get stronger. That’s why this is the right time to make sure your roof is still holding steady after the summer storms. Wind damage isn’t always obvious, and it’s easy to miss early warning signs when you’re not sure what to look for. That’s where a focused plan comes in, starting with learning how to spot the damage early.

Identifying Wind Damage

After a storm, especially one with strong wind gusts, it’s smart to take a good look around your property. If the roof took a hit, there are usually some signs left behind even if they’re easy to miss at first. A few clues might show up on the driveway or lawn, while others are more visible only from the roofline or just below the gutters.

Here are some of the more common signs of wind damage on roofs:

– Shingles that are completely missing or appear to be curling or flapping when the wind blows

– Cracks along the edge of the roof or sagging sections, especially on older homes

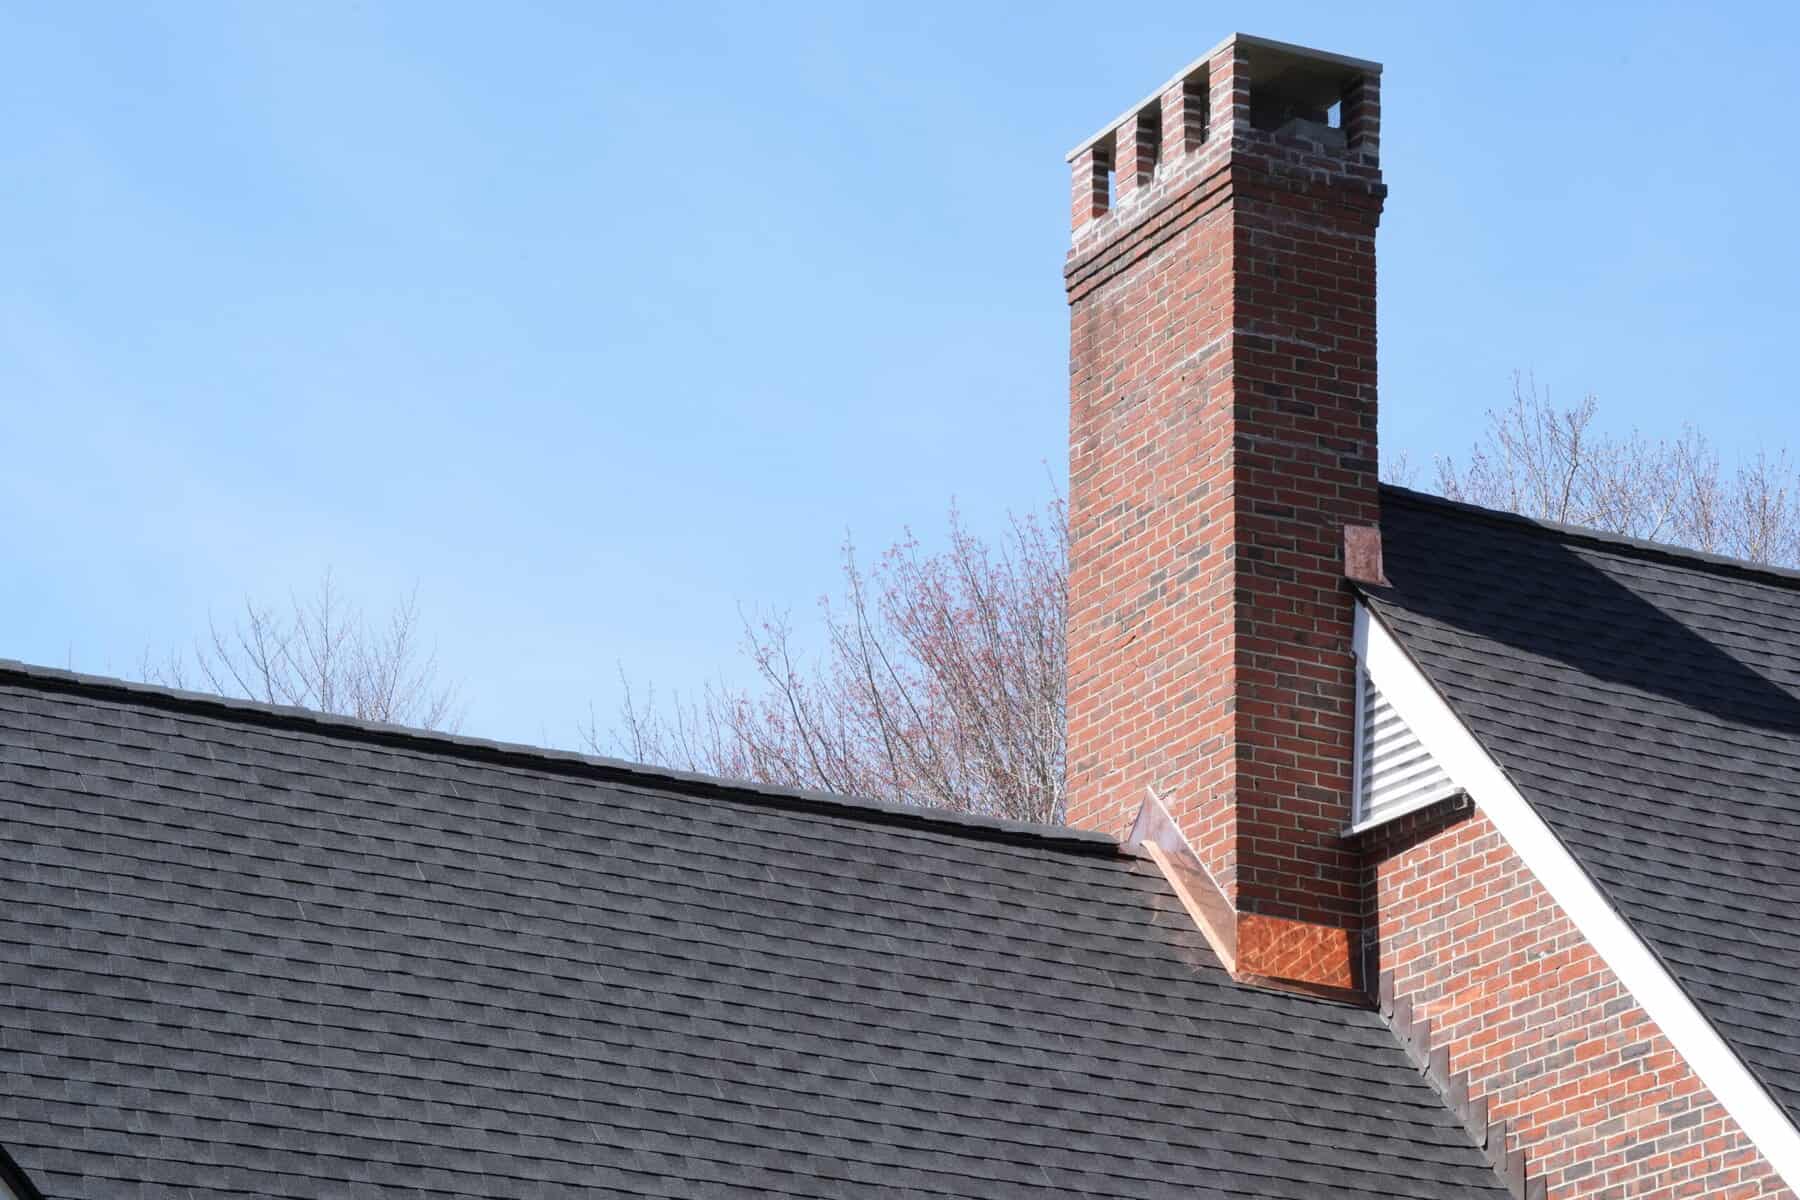
– Displaced flashing around chimneys, vents, or skylights. Bent or missing pieces could leave gaps for water to sneak in

– Granules scattered in your gutters or on concrete surfaces below. Roof granules look like black or gray sand and usually shake loose from shingle wear

One easy way to spot flashing problems is if water starts dripping along indoor ceiling corners after a storm. That may mean flashing has pulled away just enough to let moisture slip inside.

If you’re walking around the yard and see tree branches on the roof or broken shingles on the ground, it’s likely there’s impact damage. A big limb can easily lift shingles or dent structural layers below. And remember, even one missing shingle can begin a chain reaction of problems when the next rain rolls in.

Immediate Steps To Take After Wind Damage

Catching wind damage is important. Acting quickly after spotting it is even more important. Once you see signs of trouble, there are a few key things you should do right away to help prevent further damage and speed up repairs.

1. Keep away from dangerous spots. If there are loose materials hanging from the roof, broken tree limbs, or anything else that looks unstable, it’s safer to stay on the ground and step back.

2. Snap clear photos. Take pictures of damaged shingles, bent flashing, fallen branches, or anything else out of place. Try to get a few close-up shots and a wider view to show where the problem fits in with the rest of the roof.

3. Don’t try to fix it yourself. Wind damage can leave weak areas or hidden leaks you won’t notice right away. Climbing up can make things worse or even put you at risk.

4. Call a roofing contractor to handle the inspection. A professional can safely climb up, check all the damage, and figure out what needs to be fixed or replaced.

5. Start the insurance claim process. Once you have documentation and you know there’s a clear issue, contact your homeowner’s insurance agent. Provide them with the photos and an outline of what happened and when.

Addressing issues quickly can make all the difference. Even small tears in the underlayment or slight shifts in flashing can lead to leaks once cold weather sets in. Fall storms build momentum this time of year, and being proactive keeps a small issue from becoming a big one down the road.

Long-Term Solutions For Wind Damage

Short-term fixes might stop immediate leaks, but lasting protection comes from using the right materials and keeping your roof in solid shape year-round. In places like New Castle, where strong fall winds and coastal storms are always waiting in the wings, a long-term plan really matters. If you’re only reacting to damage after every storm, your roof won’t last as long as it could.

One thing that makes a big difference is using high-quality materials. Some shingles are built to hold stronger in wind-prone areas. Others are more flexible, less likely to crack or lift. The way your roof is installed also plays into how well it holds up when the wind gets moving. A tightly sealed ridge cap and properly anchored flashing are just as key as the shingles themselves.

But even good materials wear down under constant stress. That’s why regular check-ups are so important. Think of it like going to the eye doctor. Maybe you don’t feel like you need it, but keeping it up helps catch small issues before they become bigger problems. A trained roofing contractor can look for weak points that the average person would miss. For example, we had a job in a coastal neighborhood where a homeowner thought only two shingles were missing, but a full inspection revealed several areas where the underlayment had peeled up due to past winds. They had no idea.

The goal is to give your roof the best shot at lasting through season after season. Installing wind-resistant roofing components and keeping up with every little repair adds up. It’s a steady plan that helps avoid costly damage later and keeps your household protected through all the rough stretches of New Castle weather.

Hiring A Roofing Contractor In New Castle

When your roof is dealing with wind damage, fixing it the right way depends on choosing a roofing contractor you can trust. Not every contractor has experience with coastal homes or storm-damaged properties, so it helps to go local and find someone who knows how New Castle weather works.

Here’s what to look for when you’re hiring someone to handle roof repairs after a storm:

– Make sure they specialize in residential roofing and have experience with wind damage

– Ask if inspections include photos and written reports, not just a quick walk-through

– See if they’ll help you understand the extent of the damage before talking about replacements

– Look for someone based nearby, with knowledge of weather patterns in the New Castle area

– Check that they’re fully licensed and insured to work on your home

During your inspection, a good roofing contractor will do more than just glance at the problem spot. They’ll check the flashing, vents, ridge caps, and look under the first layer of shingles to catch damage hiding underneath. If the roof deck has softened or moisture has built up below, they’ll know the right steps to take.

You want someone who’s straightforward, who can tell you if a repair is enough or whether it’s time to think bigger. The right contractor won’t scare you into a full replacement unless that’s really the best option. They’ll outline what’s needed, walk you through the repair plan, and keep you informed each step of the way.

Protect Your Home from Wind Damage

Wind damage isn’t always loud and obvious. Sometimes it’s just one cracked piece of flashing or a spot where the shingles don’t line up quite right. But those small issues are where the biggest problems start. Catching them early is the best way to avoid emergency repairs during a heavy rain or unexpected cold snap.

Routine inspections and picking the right contractor to handle repairs can make all the difference in keeping your home safe. Wind might always be part of life in New Castle, but roof damage doesn’t have to be. A steady plan, a careful eye, and regular upkeep are all it takes to stay ahead and avoid bigger headaches.

If you’re looking to protect your home from unpredictable coastal weather, you can count on a trusted roofing contractor in New Castle to get the job done right. At J. Carnes & Son Roofing, we’re here to help you keep your roof secure, damage-free, and ready for whatever the next storm brings. Reach out to get started on a plan that works for your home and your peace of mind.

Gutter Overflow Issues During Heavy Dover Rainfall

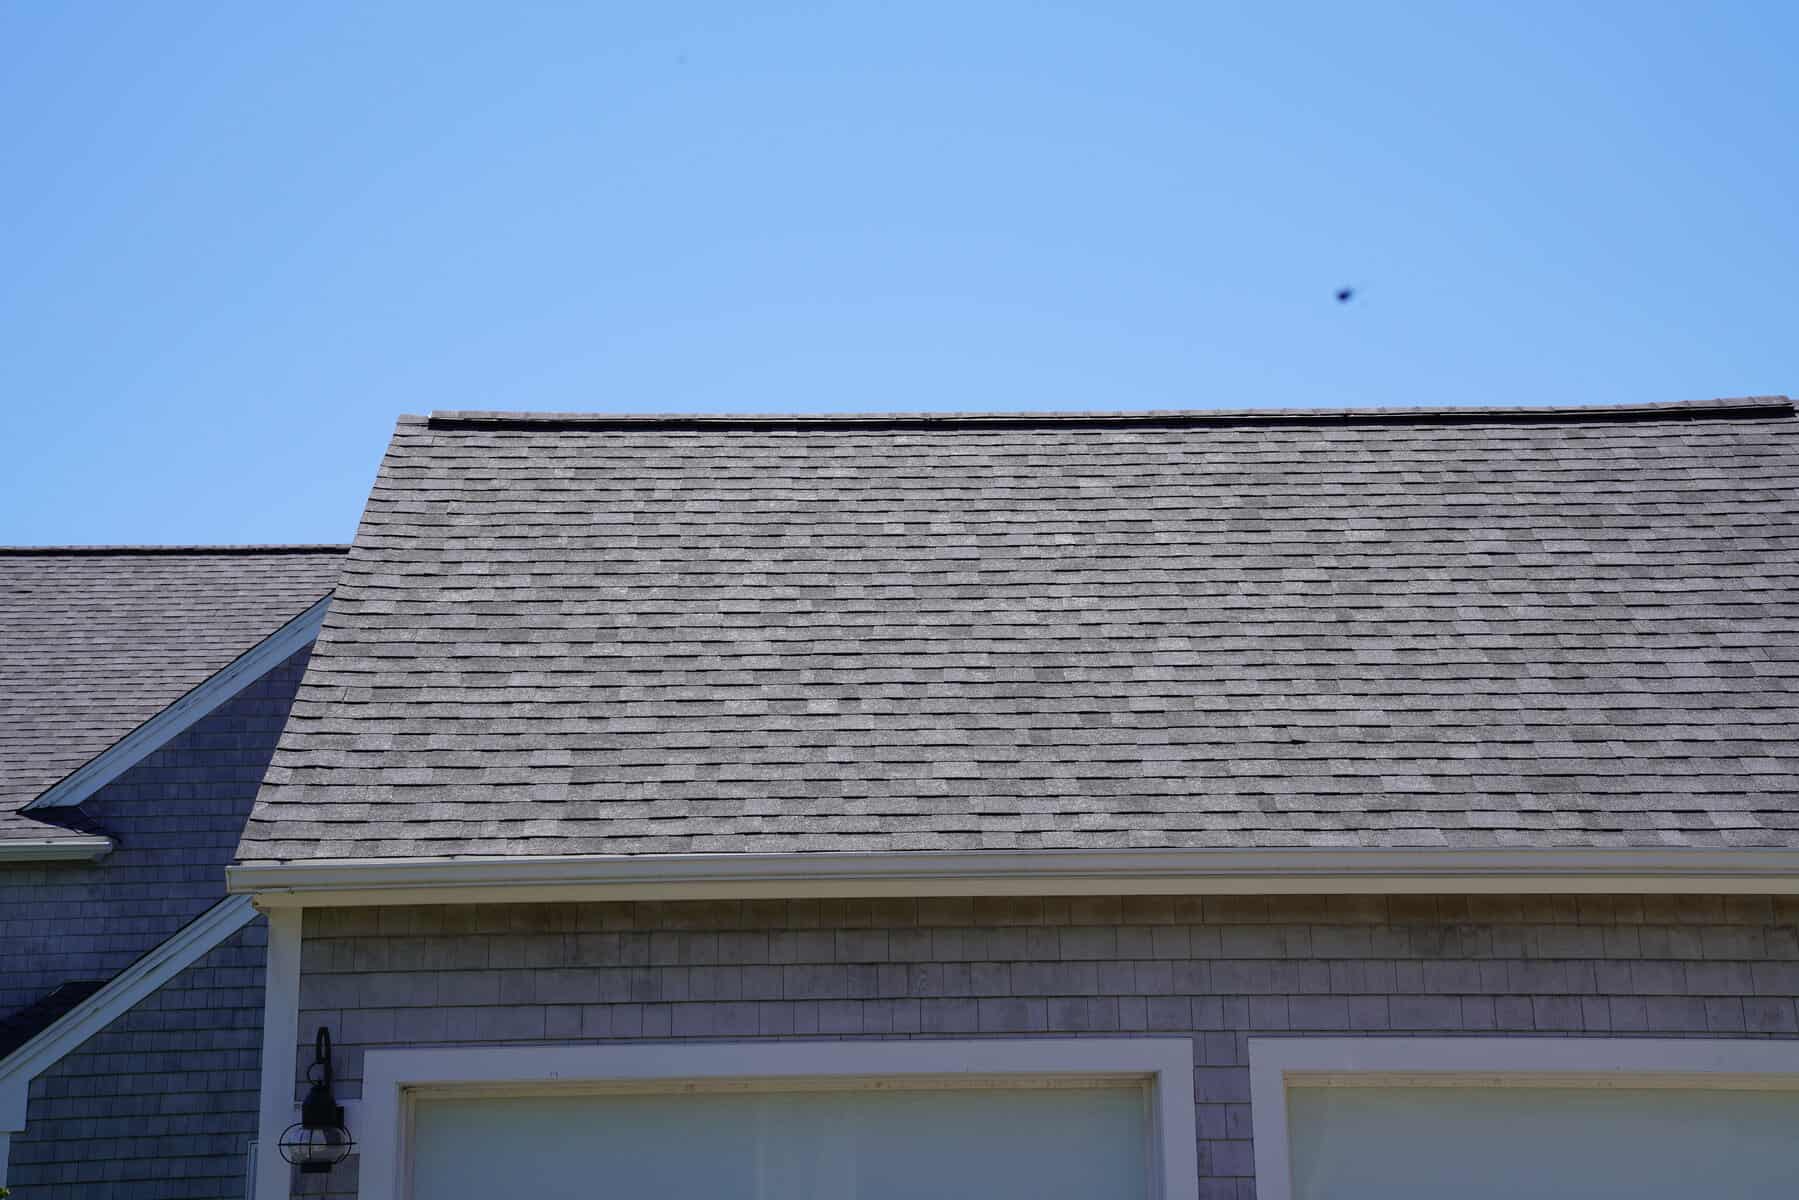
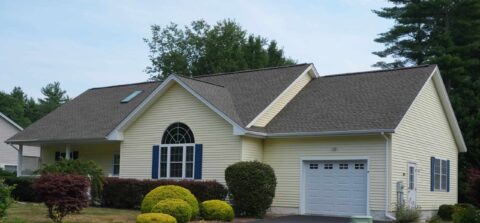
New architectural shingle roof and white seamless gutters installed on a New Hampshire home by J. Carnes & Son Roofing

Heavy rain is no stranger to Dover, and when it rolls in, your home’s gutter system works overtime. While gutters might not get much attention day to day, they are one of the most important parts of protecting your house from water damage. When they clog or overflow, problems can start piling up fast, from soaked siding to basement leaks. Preventing these issues starts with paying attention to how well your gutters are handling the rainfall.

If you’ve ever spotted water pouring over the sides of your gutters like a waterfall, that’s a clear sign something is off. Overflowing gutters can’t do their job of moving water safely away from your home. The damage they leave behind can be frustrating and expensive. In places like Dover where fall rains can be heavy, staying on top of your gutter maintenance can make a big difference.

Understanding Gutter Overflow

Gutter overflow happens when water can’t flow freely through your system, so it spills over the sides instead. This typically happens during storms or long periods of rainfall when your gutters are overwhelmed or blocked. The more rain that falls in a short time, the higher the risk of overflow.

This might not sound like a big deal at first, but it can cause issues for your home’s structure and roof. Water that flows down the sides of your house can seep into walls, damage siding, or create cracks in the foundation. Overflow can also lead to rotting roof edges if water gets stuck near the fascia board. Plus, standing water around your house can lead to soil erosion and puddling near walkways or driveways.

Think of it like pouring water into a bucket with a sponge jammed at the bottom. At first, it fills up slowly. Then all of a sudden, it overflows and that’s when the real mess starts.

Common Causes Of Gutter Overflow

When gutters don’t drain properly, one or more of these problems might be to blame:

1. Leaves and debris blocking the flow. Over time, fallen leaves, pine needles, and twigs collect in the gutters, especially in neighborhoods with lots of trees. These blockages act like dams and stop water from flowing through the system.

2. Undersized gutters. Some homes, especially older ones, have gutters that aren’t big enough for the amount of runoff that comes from the roof during a strong storm.

3. Not enough downspouts. If downspouts are spaced too far apart or aren’t wide enough, water backs up because it can’t drain fast enough.

4. Improper slope. Gutters need a slight tilt to help guide the water toward the downspouts. If they’re level or sloped in the wrong direction, water pools instead of draining.

5. General wear over time. Sagging sections or joints coming apart can stop water from flowing smoothly. Even a small gap can cause a section to leak or overflow.

Recognizing and addressing any of these common issues early has a big impact when it comes to reducing water damage during heavy rains. Getting ahead of overflow concerns starts with understanding these root causes and keeping an eye out each season.

Preventative Maintenance Tips

Taking steps to prevent gutter overflow is a smart move, especially before Dover’s rainy season kicks into gear. While heavy rains can’t be avoided, how your gutter system handles them is something you can have control over with the right care routines.

Here are a few regular tasks that can help you avoid problems when the next big storm hits:

1. Clean your gutters out routinely. Debris can sneak up fast, so checking them every few weeks, especially in the fall, helps keep the water flowing where it should.

2. Use gutter guards to cut down on the mess. These covers don’t eliminate the need for cleaning, but they help keep out larger chunks like twigs and clumps of wet leaves.

3. Check your downspouts. Water should move away from your house, not pool around the base. If downspouts are backed up or crushed, they can’t drain right.

4. Look out for damage or sagging. Gutters that pull away from the fascia or have cracks won’t work well. Bent sections should be realigned or replaced when needed.

5. Watch what collects around the edge of your roof. Overflowing gutters can be the result of problems higher up, like ice dams or loose shingles keeping water from draining correctly.

By adding these simple steps to your home care checklist, you’re more likely to catch problems early and avoid larger headaches down the road.

How Professionals Can Help

While it’s great to stay on top of gutter upkeep, some repairs and inspections are best handled by trained pros. A full system check can uncover hidden clogs, leaks, or placement issues you might miss. Professionals can assess whether your current setup is sized correctly and sloped the right way to handle Dover’s common rain patterns.

They can also repair or replace worn-out sections, add downspouts where needed, and help you choose upgrades like guards or larger-capacity gutters, based on your roof layout. Having someone with the right tools and training take care of this work means your system is more likely to hold up during those heavy fall downpours.

Fixing things now, before problems stack up, can save both time and stress. A small adjustment today might keep you from needing major repairs later if water damages your siding or creeps into your foundation.

Keeping Your Dover Home Safe From Heavy Rain

Gutter overflow might seem like a side issue, but it can affect your entire home. Water that doesn’t drain properly threatens more than just the roof. It can impact your landscaping, walkways, siding, and even your structure’s base. Taking preventive steps, staying aware of warning signs, and dealing with clogs early are key to avoiding long-term problems.

Each rainy season brings another chance for gutter systems to be tested. For homes in Dover, preparation is the best defense. Whether it’s checking for drooping sections, clearing out leaves, or upgrading outdated parts, treating your gutter system seriously helps protect everything below. Once that heavy rainfall starts coming down, you’ll want to feel confident that your roof and gutters are ready to handle it.

Convinced that your home needs better preparedness for heavy rainfall in Dover? Don’t wait until gutter issues turn into major headaches. Discover how roofing in Dover from J. Carnes & Son Roofing can help protect your home from the elements. Our experienced team is ready to make sure your gutters and roof are working together to keep your home safe and dry. Whether it’s maintenance or upgrades, you can count on us for expert, long-lasting solutions.

Stopping Water Seepage Through Roof Valleys

Water Leak

Roof valleys play a bigger role in keeping your home dry than most people realize. These are the areas where two roof slopes meet, creating a channel that directs rainwater and snowmelt off the roof. Because they collect so much water, roof valleys are more prone to leaks than other parts of the roofing system. If water seeps through here, it can lead to rotted wood, stained ceilings, and even mold inside the home.

As we head into the fall season in Epping, it’s a smart idea to take a closer look at areas that can cause future trouble, especially your roof valleys. Spotting problems early and learning how to prevent them can save you from big, expensive repairs down the line. Let’s look at what causes water seepage in these high-risk areas, along with how to recognize the warning signs.

Understanding Roof Valleys and Water Seepage

A roof valley is where two slopes of a roof meet, forming a V-shaped channel. It’s designed to funnel water and debris into the gutters, helping the rest of the roof stay dry and clean. Because so much water naturally flows through this spot, it needs to be protected with special materials like flashing and underlayment. If these aren’t installed the right way or get damaged over time, water can start leaking into the home.

Several things can go wrong in a roof valley that lead to seepage:

– Poor installation, such as overlapping materials in the wrong direction or failing to direct water properly

– Cracked flashing or deteriorated sealant, which can let moisture slip into the layers underneath

– Debris buildup like leaves and twigs that block water flow, causing it to pool or back up under the shingles

– Ice dams during the winter, where melting snow refreezes and forces water under the roofing material

– Age-related wear and tear causing general deterioration, especially in roofs over a couple of decades old

Even something simple like a nail popping out in the wrong spot can open the door for water to sneak in. One example we’ve seen in Epping is a homeowner who replaced a few shingles near their valley after a windstorm, not realizing the protective layering had shifted. Within a few weeks, stains started appearing on their ceiling because water had found a path inside.

Signs of Water Seepage in Roof Valleys

Leaks aren’t always noticeable right away. Some signs of trouble will appear only after the damage is already done, which is why early detection matters. You’ll want to look for both visible and hidden issues.

Here are some early red flags to watch for:

– Dark water stains on ceilings and upper walls

– Musty smells or visible mold near attic spaces

– Damp insulation or warped wood in the attic

– Peeling paint or bubbling drywall along the upper floors

You might also notice:

– A sudden increase in indoor humidity

– Higher-than-normal water bills (if the leak causes structural rot and increased HVAC use)

– Discoloration or rust on fasteners within your roofing structure

Not every leak means there’s a big problem, but if you see two or more of these signs, it’s worth taking a closer look. The earlier you address it, the better your roof (and home) will hold up. In fall especially, with rainy days and dropping temperatures, letting problems sit just isn’t worth the risk.

Preventative Measures for Water Seepage

The best way to handle roof valley leaks is to prevent them before they start. With proper planning and upkeep, you can keep water moving the way it should and avoid long-term damage.

Start by looking at how your roof valley was installed. Valleys need solid craftsmanship. That means underlayment tucked and layered properly, metal flashing laid where water flows the most, and shingles placed in a way that avoids creating water traps. If a valley isn’t done the right way from the start, it becomes one of the first places water finds a weak spot.

Next, keep an eye on seasonal maintenance. Roofs in Epping face a serious mix of conditions, especially as fall rolls toward winter. Leaves and pine needles tend to pile up right in valleys where they slow or block water flow. Even a small clog can push water under shingles. Clearing that out can go a long way.

Materials matter too. Cheap or poor-quality sealants and flashing tend to break down faster under heavy rain and freezing temperatures. It’s worth checking to make sure your roof valley holds up to New England weather.

Here are three habits that help keep seepage away:

– Inspect the valley at least twice a year, especially after rough storms

– Keep it clear of branches, leaves, and snow buildup

– Watch for aging materials, missing shingles, or worn-down edges

Most of the time, staying ahead means knowing what to look for and knowing when it’s time to call someone who handles roof repairs in Epping regularly. It’s much easier to make a small fix during fall than deal with indoor repairs after a winter leak.

Repair Solutions for Water Seepage

Even with good care, problems can still slip through, especially over time. When that happens, acting fast is key. Small leaks get bigger if left alone and they rarely stay in one place.

If a valley is leaking, the area around it usually needs to be checked too. Water can travel along wood and insulation before it shows up inside. That’s one reason homeowners are sometimes surprised when a ceiling leak isn’t right under the source of the problem.

Minor repair jobs may involve replacing damaged shingles or redoing the metal flashing that lines the valley itself. For deeper issues, old underlayment might have to be removed and replaced along the affected section.

Here’s what typically happens when a roofing crew fixes or replaces a compromised valley:

1. Remove shingles around the valley area

2. Take out the old flashing and underlayment

3. Check the base decking for rot or mold

4. Replace any damaged materials

5. Install new flashing and seal all seams

6. Layer new shingles correctly so water flows smoothly again

If you’re in doubt about what’s causing that stain or drip, it’s a good idea to reach out for expert help. Roof repairs in Epping demand a local approach. Contractors familiar with the region know how to build roofs that stand up to coastal rain, snow weight, and temperature swings.

Make sure the roofer you hire is licensed, insured, and experienced with the type of material your roof is made from. Ask if they’ve worked in your neighborhood before. It helps when the contractor knows what the homes around you deal with year over year.

Why Addressing Water Seepage is Crucial

Leaving water seepage alone almost always leads to bigger problems. A small leak can lead to sagging drywall, peeling paint, soaked insulation, and mold that spreads through walls and ceilings. On the outside, water damage might weaken your roof’s wood framing and create the perfect space for pests.

Damage like that doesn’t stay contained. It spreads into connected systems like attic wiring, HVAC ducts, and vent pipes creating bigger complications that cost more to fix. Once insulation becomes soggy, you lose comfort indoors and likely see energy bills climb.

The sooner you catch the signs and act on them, the more you’ll protect your home’s structure, resale value, and peace of mind.

Keep Water Out and Comfort In

Living in Epping means your roof gets tested in every season. Whether it’s heavy rains in fall, ice dams in winter, or springtime thaw, having a reliable drainage path for your roof is a must. Keeping your valley clean and inspecting it regularly are simple steps that help prevent surprise repairs and water damage.

You won’t need to worry every time it rains if your roof valley is solid. That’s the kind of peace of mind every homeowner wants. With extra attention and help from trained pros when needed, your roof can handle the harshest seasons and still keep everything inside dry and safe.

To make sure your roof stays in top shape throughout the year, it’s important to address any issues promptly. If you’re dealing with roof repairs in Epping and want to ensure your home remains protected from water damage, consider reaching out to experienced professionals like J. Carnes & Son Roofing. They have the skills and local knowledge to help maintain the integrity of your roof and keep your home safe no matter the season.

Fixing Poor Airflow in Your Exeter Home’s Attic

Roof and attic ventilation work in New Hampshire by J. Carnes & Son Roofing

If your attic has been uncomfortably hot, musty, or even leaking strange smells into your living space, poor airflow might be the culprit. When attic ventilation isn’t doing its job, the air has nowhere to go. That stale air sits, bringing moisture problems, rising temperatures, and energy waste along with it. These issues aren’t always obvious at first, but over time, they’ll start to affect your comfort and the condition of your home.

For homes in Exeter, where seasonal weather changes can be intense, attic airflow can make a big difference. Lingering summer heat and incoming fall moisture can sneak into roof spaces and build up fast. Without a good flow of air keeping things balanced, your attic can become a hidden source of damage and higher utility bills.

Signs Of Poor Attic Airflow

Sometimes the attic signals its problems clearly. Other times, it’s a little more subtle. Either way, if you know what to watch for, you can catch poor airflow early before it snowballs into bigger headaches. Here are a few common signs that your attic might not be breathing the way it should:

– Stuffiness or heat buildup: Even on mild days, the attic feels like a sauna.

– Moisture or condensation: Pipes, nails, or wooden beams look damp or show signs of water droplets.

– Mold or mildew smells: That earthy, damp smell can mean mold has started to grow due to trapped moisture.

– High energy bills: If your heating or cooling systems are working harder, your sealed-up attic could be one reason why.

– Sagging insulation: Wet insulation can lose its shape and stop working properly.

One homeowner in Exeter noticed their upstairs bedrooms were always hot, no matter how low the AC was set. After checking things out, they found mold starting to grow around attic corners where air couldn’t circulate. A simple inspection of ventilation openings revealed several blocked soffits and a section of ridge vent clogged with debris. By fixing these issues, their home cooled more evenly, and the mold stopped spreading.

Don’t wait until the damage shows up on your ceilings or in your air. These early signs are your attic waving a red flag.

Causes Of Poor Attic Airflow

When airflow in the attic goes wrong, it usually traces back to a handful of culprits. It’s a good idea to understand what leads to these problems so you can fix or even avoid them altogether.

Here are a few of the most common reasons Exeter homeowners deal with poor attic ventilation:

1. Blocked or missing vents: Soffit and ridge vents are what allow air to flow in and out of your attic. When insulation covers them, or debris builds up, airflow stops in its tracks.

2. Bad insulation placement: Sometimes insulation shifts or is installed unevenly. If it traps heat in instead of letting it circulate properly, air stagnates, and issues snowball.

3. Roof issues: Damaged shingles or leaks might not seem related, but when water gets in, it messes with insulation, clogs vents, or even causes wood to swell and block airflow spaces.

4. Mechanical blockages: Sometimes vents are installed but aren’t connected properly or get covered up during remodels or upgrades.

5. Poor design from the start: Older homes, or even newer ones without intentional airflow strategies, can lack enough venting altogether.

If you’ve noticed signs of poor airflow above, one of these root causes might be lurking just out of sight. Fixing the cause, not just the symptom, is the key to getting your attic back on track.

Solutions To Improve Attic Airflow

Once you’ve pinned down the problem, the next step is planning a fix that actually works. It’s easy to assume your attic is fine if the rest of your house feels comfortable, but behind those walls, airflow could still be struggling. The goal is to keep air circulating steadily so hot air doesn’t get trapped and moisture has a way to escape.

Here are a few trusted ways to improve how air moves through your attic, especially in Exeter homes that go from hot summers to cold, damp winters:

– Clear and unblock vents: Vents often get jammed up with insulation or dust over the years. Soffit vents are common trouble spots. Make sure nothing is covering them.

– Add ridge or gable vents: If your roofline allows, these vents help create a natural flow by letting warm air exit through the top as cooler air comes in lower down.

– Install attic fans: While passive ventilation works for many homes, powered fans placed correctly can give airflow a controlled boost when passive options aren’t enough.

– Upgrade and correctly place insulation: Insulation isn’t the enemy of airflow, but it does need to be installed with ventilation in mind. Baffles (also called rafter vents) help keep airflow paths open where insulation would usually block them.

– Have a full attic inspection: This lets professionals catch structural or design issues. It’s harder to spot airflow problems if you can’t get a full look at the space.

If your attic’s setup doesn’t support comfortable airflow, trying piecemeal fixes won’t always solve the issue. That’s why walking through the space with an expert set of eyes helps. They’ll track how air enters, flows, and exits, offering options that match your roof’s build and what your Exeter home actually needs.

Benefits Of Solving Poor Attic Airflow

Fixing attic airflow issues doesn’t just tackle the stuffy rooms or condensation patches. It gives your whole home a breathing system that makes a real difference, especially during seasonal shifts.

Better airflow in the attic helps your AC and furnace work more smoothly by reducing trapped heat in the summer and limiting ice buildup in the winter. Homes with strong attic circulation often hold temperature more evenly, which means fewer hot or cold zones you have to chase with the thermostat.

There’s also the matter of home protection. Moisture that hangs around in a badly ventilated attic brings mold, wood rot, and damage to insulation. Fixing airflow slows all that down. It also protects the roof structure and lowers the odds of unexpected repairs getting tacked onto your winter prep list.

Many homeowners note that after addressing airflow, their attics stop feeling like abandoned corners of the home. The air inside smells cleaner, and utility costs level out. It’s a quiet upgrade that supports how your whole house runs. With cold weather just weeks away after mid-September, now is a prime time to address it before snow, ice, and freezing temps set in and make access harder.

Why Experienced Roofers in Exeter Matter

Homes around Exeter face some unique weather patterns. A mix of coast and inland exposure means attics here should be built and repaired with real care. Every roof system is different, and airflow strategies that work for one house might make things worse for another. That’s why calling on experienced roofers in Exeter is the right move when it’s time to fix or upgrade attic ventilation.

Trained pros know how to evaluate everything from vent placement to roof slope and insulation layout. They’ll look beyond the obvious and catch things like misaligned air paths or poorly installed intake vents. Plus, they’ll know which types of ridge, gable, and soffit vents work better for the architecture and weather conditions here in town.

A pro can also spot damage hiding under the surface, like vents that look fine from outside but are disconnected inside the attic. With a solid inspection and proper tools, they’ll pick solutions that solve airflow issues fully, not halfway.

If your attic’s been holding in stale, damp air or showing signs of trouble, an inspection now can prevent a long list of problems this winter. Repairing airflow problems isn’t just another checkbox on your to-do list. It affects your comfort, your roof’s lifespan, and how well your entire home handles New Hampshire weather.

Keep Your Attic Airy and Comfortable

Attics aren’t usually the first place homeowners think of when problems show up in their house, but ignoring airflow can end up costing more than you expect. From cracked shingles to water buildup, poor ventilation kicks off a domino effect that spreads through a home slowly and quietly. That’s preventable with the right steps and the right team on your side.

By watching for signs like musty smells, damp insulation, or high utility bills, you’re already on the right track. With expert guidance and time-tested solutions, your attic can stop dragging down your home’s energy flow and start working with it. The sooner airflow problems get addressed, the easier your home will be to manage through the changing seasons ahead.

Experience the difference a well-ventilated attic can make with help from trusted roofers in Exeter. At J. Carnes & Son Roofing, we offer tailored solutions designed to improve indoor comfort, reduce moisture issues, and protect your roofing system through every season. Let your attic work smarter for your home with expert support and proper airflow improvements.

What to Do When Your Roof Starts Making Noises

Asphalt shingle roof on a New Hampshire home by J. Carnes & Son Roofing

Hearing strange sounds coming from your roof is never something you want to ignore. Unexpected noises like pops, creaks, or thuds can make any homeowner uneasy, especially when they happen during the night or during a windstorm. While some roof sounds might be harmless due to natural expansion or seasonal shifts, others can point to real problems hiding just beneath the surface. Knowing the difference can help you stay ahead of trouble before it becomes an expensive repair.

Homeowners in New Hampshire often deal with shifting temperatures and varied weather patterns throughout the year. That kind of change puts pressure on roofing materials, which can lead to sudden noises. Some of these sounds may be standard for your type of home, but if they start happening more often or louder than usual, your roof might be trying to tell you something. It’s worth understanding the possible causes so you can take the right steps quickly and keep your roof secure and long-lasting.

Identifying Roof Noises

The first step is paying attention to the kinds of sounds you’re hearing. Roof noises can come in different forms, and each could hint at a different underlying issue. Some of the more recognizable sounds include:

– Creaking: A common result of wood framing adjusting to temperature swings.

– Popping or cracking: Often caused by metal parts on the roof reacting to heat or cold.

– Thumping or banging: Could suggest loose shingles or something external, like branches or debris.

These noises aren’t always a sign of damage. For example, houses with wood framing will creak more during rapid temperature changes as the wood expands or contracts. Similarly, popping noises may happen on metal roofing systems after the sun hits them in the morning.

That said, it’s important to know when these noises cross the line into problem territory. If the sounds become louder, more frequent, or are paired with other signs like leaks or visible damage, then your roof might need attention. Rattling or loud bangs during windy days can mean loose shingles or flashing. Constant popping sounds that weren’t there before may mean your roof is under stress or materials are warping.

One homeowner in New Hampshire reported hearing loud banging every time the wind picked up. It turned out a piece of loose flashing was slapping against the side of the house, which eventually led to water seeping inside during a rainstorm. Picking up on noise changes like this can save a lot of time and money.

If you’re unsure whether the sounds are harmless or a warning sign, it’s safer to not ignore them. Keep notes on when the noises happen and what conditions are present, like cold mornings or windy afternoons. This will help when the time comes to speak with a roofing professional.

Possible Causes Of Roof Noises

Now that we’ve covered what those sounds might mean, let’s look at what actually causes them. Your roof is made up of lots of materials working together, and each reacts differently based on conditions outside.

Here are a few common reasons your roof might be making noise:

1. Temperature Swings

Most roofs will make some kind of sound when temperatures change quickly. This is especially true in fall, when cold nights follow warmer afternoons. Wood rafters, metal fasteners, and decking materials all expand or contract at different speeds, which can lead to creaks or pops.

2. Weather and Wind Impact

New Hampshire sees plenty of strong winds, and that can move loose shingles, flashing, or vents. These parts may hit the surface underneath or shift in place, creating thudding or banging sounds. If not fixed, this kind of movement can wear down your roofing faster.

3. Loose or Failing Components

Over time, nails can back out or materials can shift from their original position. When pieces like gutters, flashing, or shingles aren’t tightly attached, they can rattle in the wind or shift when walked on. That rattling can cause serious water damage if left untreated.

4. Structural Issues

Older homes may be more prone to noises from structural shifting. If your roof deck is sagging or there’s spacing between rafters, you might hear creaks or groans more often. This could mean moisture has already caused damage or that your home’s framing is adjusting over time.

Understanding the source of the noise can go a long way in preventing bigger issues down the road. While some scratching or tapping might just be a tree branch, steady thuds or deep creaks likely deserve a closer look. The next step is knowing how to respond before a small issue turns into a major repair.

Steps To Take When Your Roof Makes Noises

Once you’ve figured out that something doesn’t sound right up there, the next step is stopping a minor mystery from turning into a bigger problem. Roofs don’t scream for help, but the noises they make can be warning signs worth your attention. You don’t need special tools to begin, just a bit of observation and some basic caution.

Start with a visual check from the ground. Do a slow walk around your home and look at your roof from every angle you can safely access. You’re looking for shifted shingles, sagging areas, loose flashing, or anything that seems out of place. Avoid climbing onto the roof yourself. It’s a lot more dangerous than people realize, especially with unpredictable weather in New Hampshire.

Here are a few steps to guide you:

1. Watch the timing – When do you hear the noise? Early morning, windy afternoons, or cooler evenings? Noting the time and weather conditions helps with narrowing down what’s going on.

2. Listen from inside – Check different rooms. That can pinpoint the area of the roof that’s causing the sound.

3. Look for visible changes – Cracks in ceiling drywall, damp patches, or nails popping out of shingles are signs the noise could be tied to damage.

4. Keep pets indoors – If your dog or cat suddenly refuses to enter a particular room, that might be a good reason to listen more closely to what’s going on above it.

5. Reach out for help – If the noises don’t go away or keep getting worse, it’s time to call in a professional for emergency roof repair in New Hampshire.

Trying to figure it out on your own can make the issue worse or delay something that needs immediate fixing. That’s especially true if water is involved. Noise might be the first sign of a leak that hasn’t shown up on your ceiling yet.

Preventative Maintenance To Avoid Roof Noises

Most noisy roof problems don’t show up overnight. They tend to build over time. With good maintenance habits, you can avoid a noisy roof and the damage that usually comes with it.

Fall is a great season in New Hampshire to prepare your home for colder months. Since the September 11 publishing date falls right at the edge of peak roofing season, it’s a good time to focus on simple habits that can help keep things quiet above your head.

Here’s what you can do:

– Schedule regular roof inspections at least once a year. Early fall is a smart time to do this before winter hits.

– Check your attic for proper ventilation. A well-ventilated attic helps balance moisture and air flow, which reduces layout stress that can cause sounds.

– Reinforce problem areas like chimneys, vents, and skylights. These spots are more prone to letting in wind and moisture, which can both lead to noise and water damage.

– Remove any debris that’s landed on the roof. Sticks, branches, or leaves can create constant tapping when the wind picks up.

Catching small shifts early, like a curling shingle or loose caulking, can make the difference between a quick fix and a costly emergency. A roof that’s maintained each year stays quieter, lasts longer, and gives you fewer surprises after every storm.

When Your Roof Is Trying to Tell You Something

A noisy roof can feel like an odd annoyance at first, but underneath that strange creak or rattle might be something worth a closer look. The sooner you figure out the cause, the better the odds of avoiding major damage. Living in New Hampshire means your roof deals with a little bit of everything: snow, ice, wind, and changing temps. Over time, all that can take a toll.

Whether the sound is a quick pop in the morning or something louder when storms roll through, don’t ignore the signs. Most roofing problems that begin with strange noises can be caught early and fixed before they turn into leaks, sagging, or bigger repairs. A little attention now can save headaches down the line, especially during harsh weather when access to roof repairs may be harder.

Being proactive adds protection to your home and peace of mind to your routine. When something doesn’t sound right, it’s probably the right time to act.

When your roof demands attention, acting quickly can prevent small annoyances from turning into costly repairs. Don’t let unusual sounds or visible signs of damage become bigger issues over time. If you need emergency roof repair in New Hampshire, trust J. Carnes & Son Roofing to provide the reliable, expert service you deserve.

Solving Light Leaks Around Skylight Frames

Skylight

Skylights can be a great addition to any home, bringing in more daylight and giving rooms an open, airy feel. But when light starts peeking through where it shouldn’t, like around the edges of the frame, it can mean there’s a problem. Light leaks may seem harmless at first, but they often hint at gaps or damage that could let in more than just sunshine. Left unchecked, those small leaks can allow moisture in, leading to bigger headaches like water damage or energy loss.

Fall is a good time for homeowners in New Hampshire and Southern Maine to check for these issues. As temperatures drop and the seasons change, skylight frames may expand or contract slightly. That shift can create tiny spaces that allow both light and cold air through. Addressing a light leak is more than just fixing a crack. It’s about making sure your roof is sealed, insulated, and doing its job. For that reason, skylight installation contractors are often called in to assess and solve these problems before they turn costly.

Identifying Light Leaks

Catching a light leak early can save you from dealing with a bigger roofing issue later on. The good news is that spotting the signs isn’t too hard if you know what to look for. Sometimes it’s a thin ray of sunlight visible when the skylight is closed. Other times, it shows up as a draft or a faint outline of daylight along the frame during certain times of the day. Homes with vaulted ceilings or taller skylight installations might notice it faster, especially if sunlight reflects from unusual angles.

Here are some of the most common signs that light leaks might be coming from your skylight frame:

– A defined shaft of light around the frame, especially when closed

– Drafts near the skylight, even when temperatures are mild

– Visible cracks or worn caulking around the skylight frame

– Fading or discoloration of nearby walls due to UV exposure

– A whistling sound on windy days pointing to poor sealing

These leaks can be caused by several things. Sometimes the original installation wasn’t done properly. In other situations, seals and materials just wear down over time. Expanding and contracting due to seasonal temperature changes can loosen the skylight’s fit. Even the best installations may need adjustments as the years go by. The important part is recognizing these early warnings before more than just light starts coming through.

DIY Troubleshooting Steps

Before picking up the phone, homeowners can take a few simple and safe steps to narrow down the issue. If the cause is basic—like cracked sealant or a poorly fastened screw—it can be helpful to get a closer look and decide if it needs fast attention from a professional.

Here’s a quick checklist to follow if you think your skylight is leaking light:

1. Look closely at the skylight during daylight hours to see if light passes through visible gaps.

2. Inspect the trim and interior frame for any loose joints or surface cracks.

3. Check the exterior seal around the skylight if accessible. Flaking sealant is a red flag.

4. Use a flashlight at night from outside. Have someone stay inside and check for incoming beams through the edges.

5. Feel around the skylight on a breezy day. Cold air might signal light can get through too.

If any of these steps turn up gaps, damage, or uncertain areas, it’s usually best to bring in a contractor. Fixes like adding temporary caulk or doing a patch job might hold up for a little while, but they rarely last through New England winters. A professional inspection will go deeper, finding out what exactly is going wrong and how to fix it properly.

Professional Solutions for Light Leaks

Some skylight problems can’t be solved with a tube of caulk or a screwdriver. When that’s the case, it’s time to call a skylight installation contractor in New Hampshire. These pros know what to look for, how to repair it right, and most importantly, how to do the work safely—especially when it means climbing up on a wet or steep roof during fall.

The process usually starts with a close visual check, inside and out. Contractors will inspect everything from seals and flashing to frame alignment and surrounding shingles. If the problem is simply failed sealant or a small gap, they may reseal the frame using weather-tough materials that are made to last. If the frame is warped or if the original setup wasn’t done correctly, they may need to make adjustments or replace parts altogether.

Here are some typical services a contractor might offer to fix skylight leaks:

– Removing and replacing worn or cracked flashing

– Resealing frames using high-performance sealants

– Fixing installation issues by realigning or rehousing the skylight

– Installing insulation to block energy loss through the skylight

– Re-caulking old frame sections no longer holding a seal

Getting a contractor involved means the problem gets handled at its source. Temporary patches might make the light go away for now, but without solving the deeper issue, it’s likely to show up again—usually at the worst time like during heavy rain or snow.

Preventative Maintenance Tips

Once your skylight’s been repaired, it’s smart to add it to your regular home maintenance schedule. The weather in New Hampshire and Southern Maine can be unpredictable. That means even a perfectly installed skylight might shift a bit or wear down faster than expected. A little checking once or twice a year can go a long way.

Here are a few easy things you can do to keep your skylight in good shape:

1. Check skylights at the start of fall and spring when temps begin to change.

2. Clean both the glass and the surrounding metal or trim.

3. Trim back trees that might leave debris on the roof and trap moisture.

4. Keep an eye on the ceiling underneath for water stains or signs of leaking.

5. Schedule a contractor every couple of years just for a quick inspection.

Most of these don’t take much time but can help prevent bigger problems. That small hole in the seal or a screw working its way loose could lead to more serious damage down the road if it’s left alone. A few minutes of effort can provide seasons of peace of mind.

Keep the Light but Lose the Leaks

Light leaks around skylights may not seem like a big deal at first. It’s just a little sun slipping through, right? But it nearly always means something else is going on—and it’s better to tackle it sooner than wait for how bad it can get. When UV rays or drafts start showing up, it’s time to take action.

Keeping your skylight system strong means keeping your home protected. Seasonal changes, shifting temperatures, and normal wear can all create issues, but they don’t have to become disasters. A watchful eye and calling a trusted contractor are usually all it takes. Whether it’s sealing, replacing flashing, or doing a full correction, getting help from skylight experts can keep everything working the way it should. If your skylight shows signs of trouble, now’s the time to deal with it, before wind and rain test your roof even more. Staying on top of things now makes the next season that much easier.

If you’re seeing light leaks around your skylights, now’s the time to reach out to trusted skylight installation contractors who can make sure everything is sealed up tight. J. Carnes & Son Roofing delivers dependable solutions that keep your home comfortable, energy efficient, and ready for whatever the New England weather brings.

What Those Black Streaks on Your Kingston Roof Mean

Asphalt shingle roof on a New Hampshire home by J. Carnes & Son Roofing

If you’ve noticed black streaks running down your roof in Kingston, you’re definitely not the only one. These dark stains can seem like nothing more than cosmetic issues at first, but they might be a sign of something more serious. While they’re easy to overlook, especially from ground level, they often suggest growing problems that can shorten the life of your roof if not handled early.

The good news is they’re not a mystery. These streaks have specific causes and patterns, and the more you understand about them, the better equipped you’ll be to protect your home. From what creates them to the harm they can cause and how to safely get rid of them, learning what these black marks really mean can help you stay ahead of roof damage.

What Causes Black Streaks on Roofs?

Black streaks usually come from a type of blue-green algae known as Gloeocapsa Magma. It thrives in humid environments, slowly spreading across shingles and growing darker over time. When the algae takes root, it holds onto moisture which can weaken the integrity of your roofing materials.

Kingston’s summer atmosphere adds more moisture to roof surfaces, especially where sun and shade interact. Roofs shaded by trees or north-facing slopes don’t dry as quickly, creating prime conditions for algae growth. You may also notice it forming after a stretch of wet weather, particularly after humid July and early August days leading into the later summer.

Besides algae, black streaks sometimes come from other sources like:

– Leaves and pine needles piling up over certain areas

– Soot or environmental pollutants settling on the roof

– Runoff from metal flashing that oxidizes and stains nearby shingles

– Wear and tear breaking down roof materials, showing signs through streaking patterns

Whatever the cause, the streaks tend to keep spreading if left alone. One homeowner we worked with saw streaks start above a window awning and eventually stretch halfway across their roof simply because that section didn’t get direct sunlight. Small signs can become bigger problems unless they’re dealt with early.

Potential Damage from Black Streaks

Even though roof streaks start as an eyesore, they can also set the stage for real damage. It’s not just a matter of curb appeal. Those dark patches can signal that your shingles are holding moisture, which is never good. When moisture sits for too long, it gradually wears down the surface of your roofing and eats into its lifespan.

In some cases, these streaks may hide deeper problems like poor ventilation or trapped humidity within the attic. If your roof doesn’t breathe properly, slimy black algae can survive longer than usual because dryers, bathroom vents, and seasonally warm air from inside the house can add to the dampness. This combo makes it much easier for algae to stick around year after year.

Having black streaks can:

– Fade shingle color and dull your home’s appearance

– Invite further algae or moss growth, especially under rainy conditions

– Lead to granule loss on asphalt shingles, which makes them age faster

– Signal drainage issues that might result in bigger water-related problems

When you catch the streaks early, you’re helping your roof last longer. Letting them stick around year after year does more than create a stain. It can turn into real structural roof damage and even begin affecting indoor comfort if moisture starts leaking into the attic surfaces.

Preventing and Treating Black Streaks

The best way to handle black streaks is to stop them before they spread. Once algae and moisture take over one area of the roof, it’s easier for the problem to move across other parts. Prevention combines smart upkeep habits and regular roof checks, especially during late summer when conditions in Kingston are still warm and humid. This is the stretch of the year when algae can thrive if left unchecked.

Here are a few ways to help prevent black streaks from building up:

– Trim back tree limbs that hang over your roof. This allows more sunlight to dry the roof and keeps falling leaves or pine needles from sitting there.

– Keep gutters and downspouts cleared out. Clogged gutters can overflow and introduce extra moisture to your roof edge.

– Remove debris from your roof after heavy storms or windy weather that may knock down branches or trash.

– Have a roofing expert inspect your attic ventilation. Poor airflow can create excess humidity and encourage streak-causing algae.

When streaks have already appeared, the safest route is professional cleaning. Not every roof is safe to stand on, and using the wrong cleaner or pressure level might actually damage the shingles. A pro knows how to treat the algae and remove the stains with roof-friendly products that won’t cause more harm than good. Plus, they can check for any hidden moisture problems while they’re up there.

Trying to scrub the stains off yourself isn’t a great idea. Harsh pressure or chemicals can strip away the surface of asphalt shingles and leave your roof less protected. The job goes deeper than just making the roof look clean. You want to remove the source of the streaks without weakening the roof in the process.

When to Call a Roofing Professional in Kingston

It’s usually time to get help when streaks don’t go away or new ones keep popping up after cleaning. A good rule of thumb is to watch for patterns. If you clean part of your roof and the stains come right back every summer, something in the environment or roofing structure may be making the problem worse.

You’ll also want to call a pro if you notice:

– Soft or spongy sections of roofing near the black streaks

– A musty smell in the attic or upstairs rooms that could signal trapped moisture

– Moss or lichen growing near the same areas

– Black streaking that begins near roof valleys or gutters, where water might be sitting too long

A trusted roofing contractor will not only remove the dark streaks but also look at your roof setup as a whole. That includes ventilation, attic insulation, roof pitch, and even how your gutters are flowing. Once they find where the conditions are right for algae to spread, they can help fix it at the source.

Ignoring the signs or just treating the streaks as a cosmetic issue won’t keep things from coming back. By recognizing there’s more to it, you’ll help your roof stay stronger and last longer without unexpected problems sneaking up in the background.

Keeping Your Kingston Roof Clean and Healthy

Black streaks shouldn’t be ignored, especially in places like Kingston, where warmth and moisture create the perfect environment for roof algae to take hold during late summer. They may look like minor surface stains at first, but they often signal the kind of long-term wear that leads to damage if left alone. Whether it’s algae growth, standing moisture, or something going wrong with your ventilation, there’s usually more going on beneath the surface.

The good news is that these issues can be handled early. When your roof is regularly inspected and cleaned before anything serious develops, those dark patches don’t have the chance to become bigger repairs later. Taking a proactive step can end up saving time, money, and frustration over the life of your roof.

To keep your roof looking its best and free from pesky black streaks, regular inspection and maintenance are key. Discover how J. Carnes & Son Roofing can help with your roofing in Kingston needs, offering reliable services and expert care to keep your home protected through every season.

Loose Flashing Problems Around Chimneys in Epping

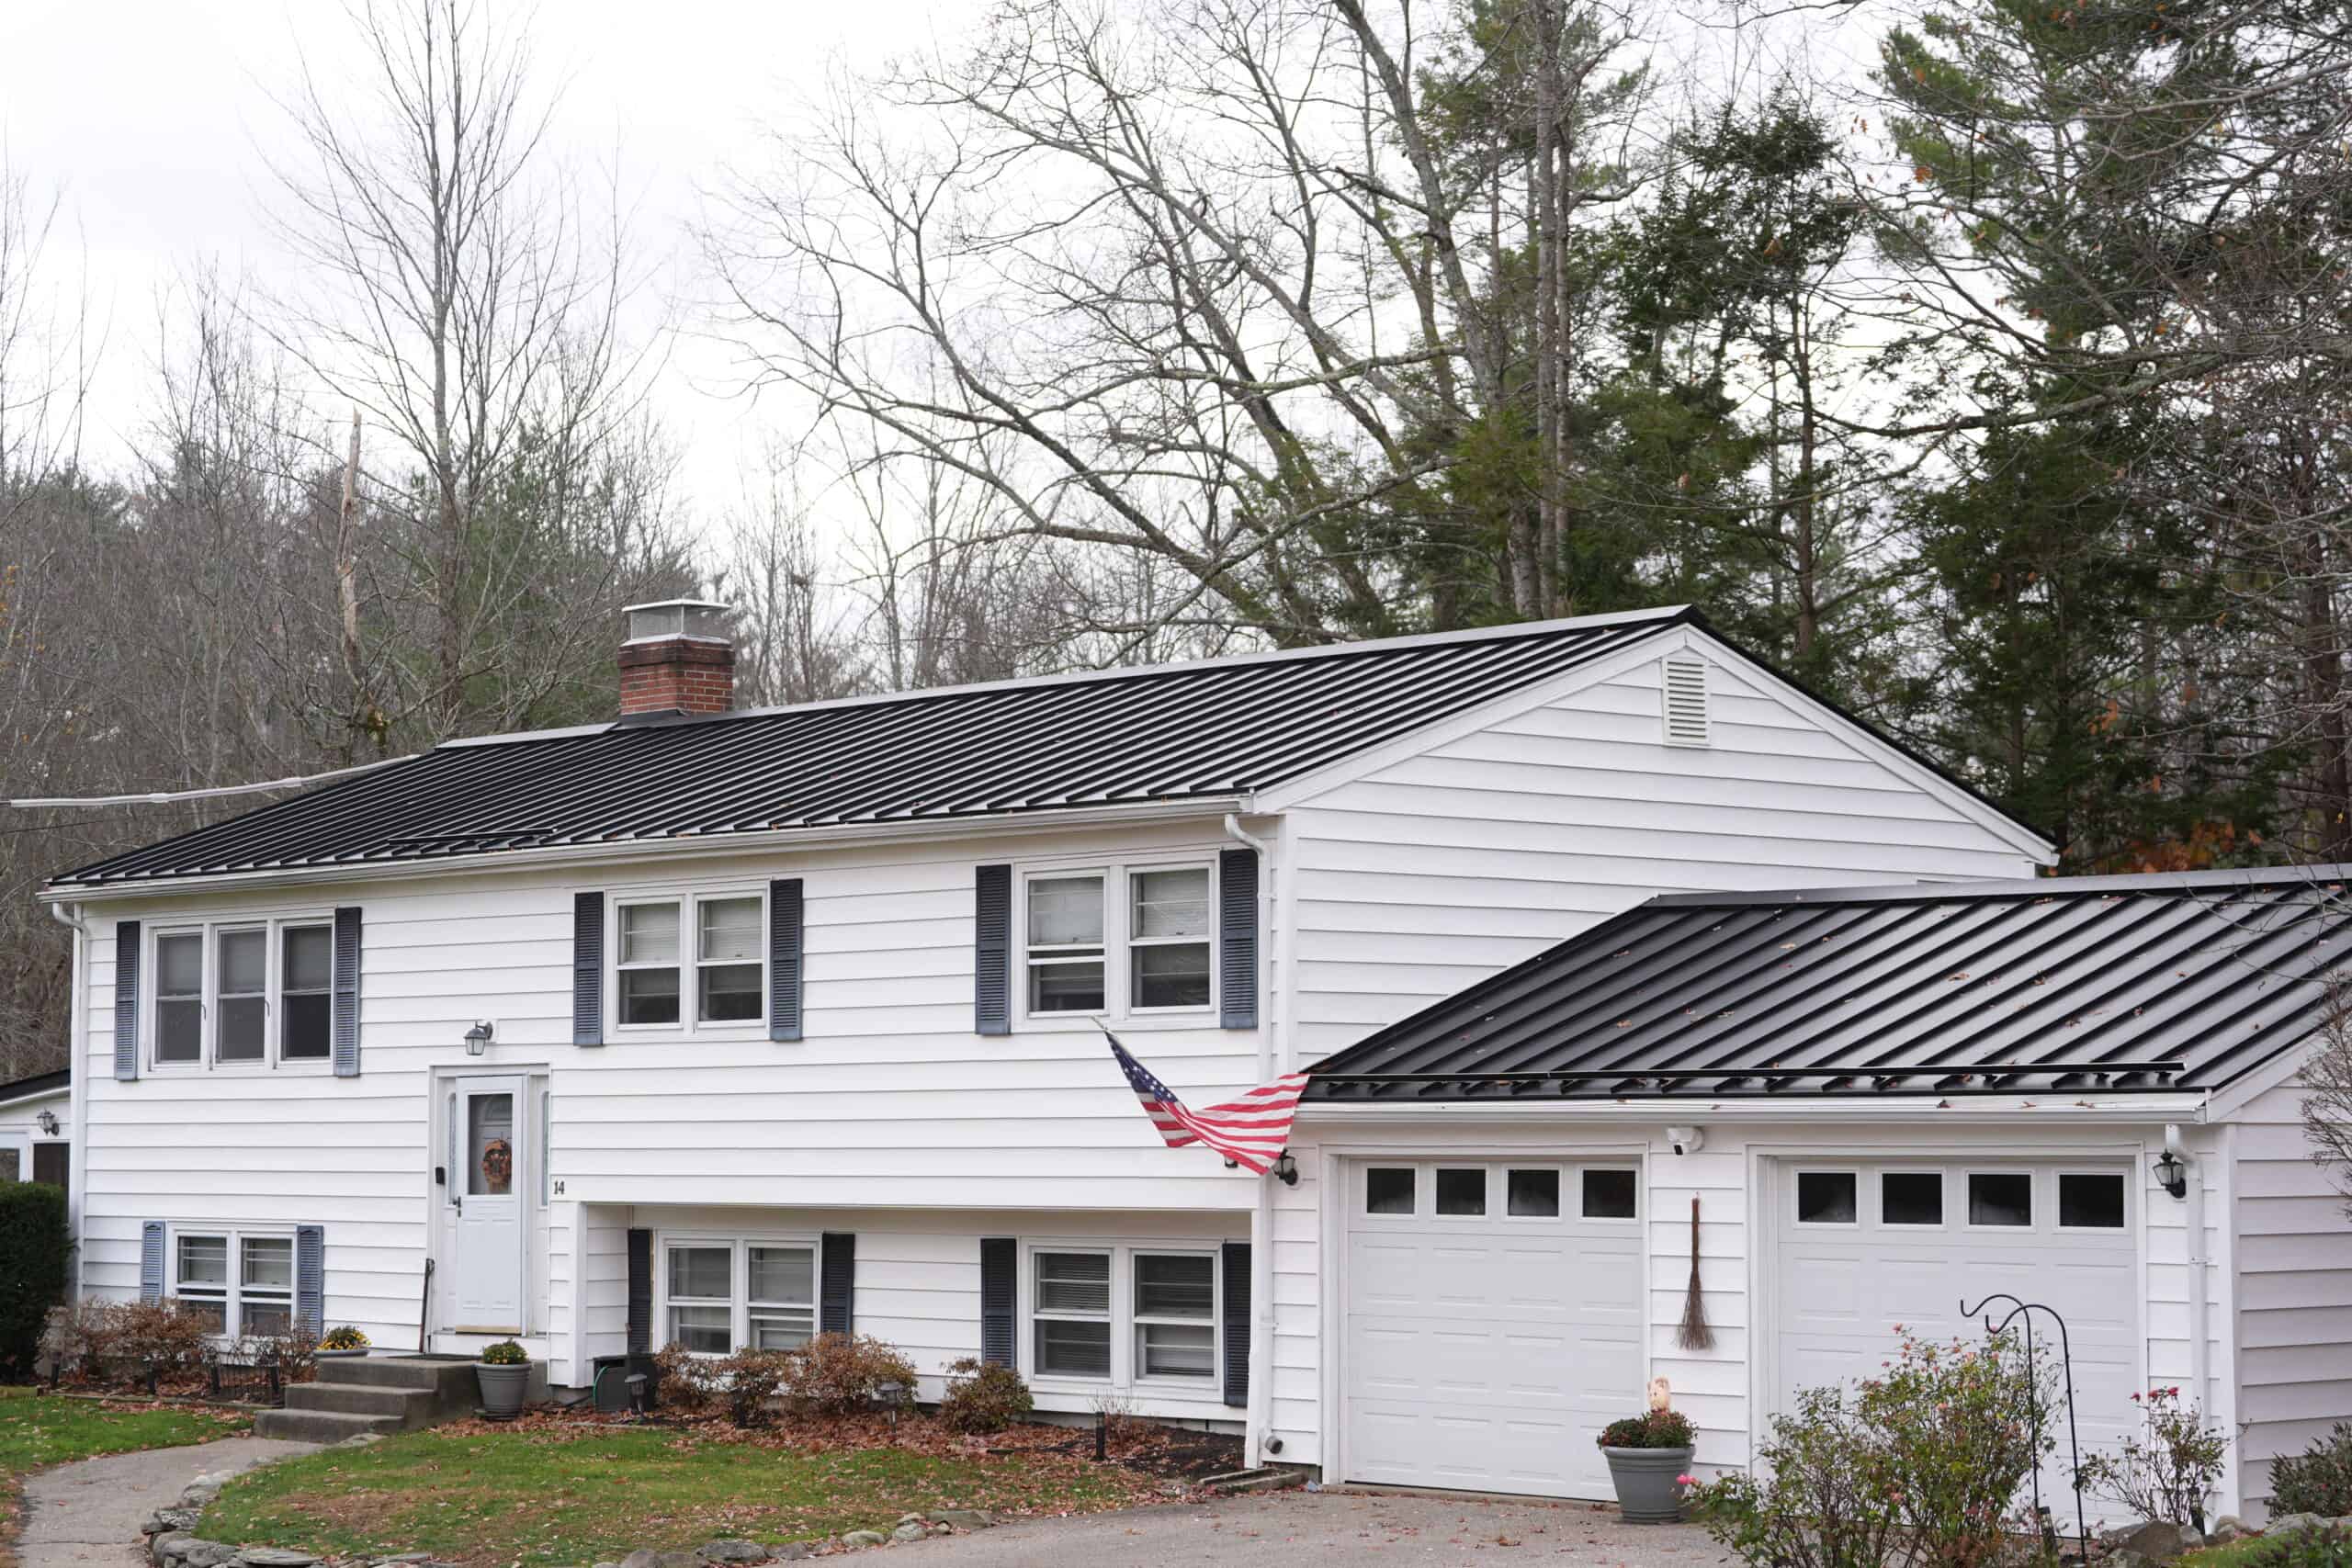
Black standing seam metal roof installed by J. Carnes & Son Roofing on a white split-level home in New Hampshire

Roof issues are never fun to deal with, but some sneak up on homeowners more quietly than others. One of the most common and easy-to-miss problems is loose flashing, especially around chimneys. Flashing is supposed to keep water out of places where the roof surface changes, such as where the chimney connects to the roof. When it stops doing its job, water can start creeping in, causing trouble that isn’t always obvious at first.

In a place like Epping, where the weather can be tough on roofs throughout the year, loose flashing can go from a small issue to a major problem fast. Whether it’s summer storms or winter’s freeze-thaw cycles, the shifts in climate wear down parts of your roof over time. That’s why it’s important to know the signs and understand how this one section of your roof can lead to unexpected leaks and damage.

Understanding Loose Flashing

Flashing is thin material, usually metal, installed to direct water away from areas where the roof surface meets a vertical surface like a wall or chimney. Chimneys, in particular, need solid flashing all around their base because of how easily water can sneak into those seams. When installed correctly, the flashing keeps water from dripping down into the roof deck or the home’s structure.

Over time, flashing can shift or crack, especially if the roof has gone through strong wind, heavy rain, or ice build-up. In some cases, the flashing may have been poorly installed or was never sealed the right way to begin with. In others, the metal loosens as the roof structure expands and contracts during seasonal changes. Animals looking for shelter might even pull it up, creating entry points for water that can go unnoticed for weeks.

In Epping, where older chimneys are common and the seasons are unpredictable, it doesn’t take long for flashing to loosen. If your home has a brick chimney, the mortar can also deteriorate, giving water another way in. A small shift in the flashing can quickly lead to moisture slipping beneath shingles and soaking into the wooden layers below.

Signs Of Loose Flashing

Even if you don’t regularly check your roof, there are a few warning signs that point to problems with chimney flashing. Loose or damaged flashing often shows up in more ways than just a visible gap outside. In many cases, the signs come from inside the house, so it helps to know what to look for.

Watch out for:

– Water stains or spots on ceilings near the chimney

– Discolored patches or bubbling paint on walls in the same area

– A musty smell in the attic, chimney area, or along nearby walls

– Pieces of flashing found on the ground after a storm

– Dark streaks on the chimney bricks just below the roofline

You might also notice shingles lifting near the chimney or drooping where flashing has failed to do its job. If it rains and you hear dripping sounds coming from inside the walls or ceiling, loose flashing could be the culprit. These signs often mean water has already worked its way under the roofing materials and is finding its way inside.

Catching these issues early makes all the difference. It’s easy to patch a spot or reseal flashing before deeper damage takes hold. Ignoring it, even for a few weeks, can turn a small job into something that takes longer to fix and costs more too.

Risks Of Ignoring Loose Flashing

When flashing around your chimney comes loose and you ignore it, things can start to go downhill fast. Moisture will usually find the weakest point on your roof, and once it gets through the outer layers, it doesn’t stop. What might begin as a small leak can turn into rotted decking, damaged insulation, or stains across the ceiling inside your home. The longer water seeps in, the more it spreads into wood, drywall, and insulation.

Wet areas trapped inside walls or under roofing materials also raise the risk for mold and mildew. These can grow without being seen and stick around long after the original leak is sealed. That’s especially true in Epping, where high humidity in the summer and snowmelt in the winter feed moisture into the roof structure.

Loose flashing might also result in:

– The chimney structure weakening due to trapped water and rot

– Interior paint and drywall bubbling and peeling

– Increased wear on neighboring shingles as water runs where it shouldn’t

– Gutter overflow problems if water isn’t properly redirected

Even newer homes in Epping aren’t safe from this. Flashing problems can show up early if they weren’t addressed properly during installation. Weather here keeps your roof working hard year-round, which means these small breakdowns happen more frequently than you might expect.

Solutions For Loose Flashing Problems

When chimney flashing starts to pull loose, it’s best to call a roofing expert in Epping for a close inspection. A pro can see where the flashing has failed and whether it needs to be reattached, resealed, or replaced. Often, it’s not just about replacing the metal. You need someone who will check underneath and around the area to be sure there’s no hidden water damage already in motion.

Handled early, flashing problems don’t take long to fix. Waiting, though, can lead to more than a repair. Water can reach your attic, insulation, or even the electrical system buried in your ceiling. That’s why hiring someone with experience is key. They’ll know what to look for and will make sure the problem isn’t bigger than it looks from the outside.

Other reasons to stay proactive with chimney flashing include:

– Fewer surprises during roofing inspections or home sales

– Better control over moisture inside the attic

– Longer roof lifespan by stopping water from weakening the structure

– Peace of mind every time it storms in Epping

Late summer is a good time to take care of flashing troubles. The weather is usually dry, and sealants can set properly. Taking care of issues now helps you get ahead of fall rains and the snowy months that follow.

Your Epping Roof Deserves Attention Before It Gets Worse

Loose chimney flashing might seem like a small issue, but around here, small roofing problems can grow fast. With Epping’s changing temperatures and harsh storms, you don’t want any openings in your roof’s protection lingering too long. A single broken strip of flashing can be all it takes for water to get in and cause damage that spreads further than you’d expect.

If your home shows signs of leaks or your chimney flashing looks off, now’s the time to deal with it. Getting it checked brings peace of mind and helps avoid bigger headaches before winter shows up again. Don’t let one overlooked area turn into the reason you’re chasing water stains through your home. Give your roof the care it needs while there’s still time to fix things without a rush.

If you’re noticing signs of damage near your chimney, don’t wait for it to turn into a larger issue. For dependable help with roof repairs in Epping, reach out to J. Carnes & Son Roofing. We’ll make sure your home stays dry, secure, and ready for whatever the weather brings.

Metal Roof Expansion Problems in Summer Heat

Metal roof on a New Hampshire home by J. Carnes & Son Roofing

Metal roofs are a popular choice for many homes across New Hampshire. They last a long time, hold up well in bad weather, and give houses a sharp, modern look. Homeowners often choose them because they don’t require much upkeep compared to other materials. That said, one thing metal roofs do that can catch people off guard is expand and contract when the temperature changes. This natural movement becomes more noticeable when the summer heat is in full swing.

As July rolls on, temperatures across New Hampshire can climb to uncomfortable levels. Metal naturally reacts to that heat by expanding. And while it might not seem like a big deal at first, over time, it can lead to real roofing problems if it’s not managed properly. That’s why understanding how metal expansion works, what the signs look like, and what to do about it can help you keep your roof in working shape all season long.

Why Metal Roofs Expand In Heat

Metal expands when it gets hot and contracts when it cools down. That’s called thermal expansion, and it’s something most materials do, just at different rates. Since metal is a great heat conductor, it reacts quickly to outdoor temperatures. When a metal roof soaks up direct sunlight for several hours a day, the panels grow just a bit in size. At night, when the air cools down, they shrink back. That cycle repeats every day throughout the summer.

With summer heat bearing down during July, metal panels stretch more than they would in other seasons. The panels aren’t moving inches at a time but enough to create stress where they’re connected to the structure of your home. Fasteners, seams, and joints all feel that pressure. If those parts of the roof weren’t installed with expansion in mind, problems can show up fast. For example, we’ve seen homes where gaps opened up between metal panels after long sunny weeks, or where fasteners started popping out as the metal pulled away.

Some types of metal can handle the heat shifts better than others, but they all react in one way or another. Once movement starts causing visible damage, it means the material has been reacting this way for a while. And since summer gets hotter each year, especially in places like New Hampshire where humidity adds to the strain, it’s something homeowners should think about ahead of time.

Common Signs Of Metal Roof Expansion

If your roof is having a hard time with the heat, chances are you’ll spot a few clues. Keeping an eye out for early signs can help you avoid bigger repairs down the road. Some of the most common signs of roof expansion include:

– Buckling or ripples in the panels: When metal doesn’t have enough space to move, it can start to press against itself, creating waves

– Warped or lifted edges: Look at the edges of your roof. If they’re not lying flat or appear raised, expansion may be the cause

– Gaps at seams or joints: Small separations between metal panels or flashing can leave your roof exposed

– Loose fasteners or popped screws: When panels shift too much, screws can back out, leaving holes behind

– Unusual sounds: Creaks and pops during the hottest part of the day often come from expanding metal fighting with its fasteners

Any one of these signs might not spell disaster, but they’re all worth checking out. If multiple issues show up at once, it’s a good idea to have someone take a closer look before things get worse. Small gaps can invite moisture, which brings its own list of roofing headaches like mold, insulation damage, and leaks. The sooner the cause is addressed, the less likely the damage will spread.

Preventative Measures And Solutions

The good news is that metal roof expansion isn’t something you just need to live with. There are proven ways to reduce the impact of summer heat on your roof. When it’s installed correctly with the right parts and techniques, a metal roof can continue to handle seasonal swings without much trouble.

Here are a few key ways roofing experts approach this issue:

– Proper spacing between panels: Leaving just enough room between panels gives them space to move during hot days without forcing one into another or pulling up fasteners

– Floating clips or slide systems: This hardware allows panels to shift slightly with temperature changes instead of being locked in place, which can lead to strain or tearing

– Use of thermal expansion joints: These are specifically designed to absorb movement from thermal changes. They act like a buffer zone for the roof to expand and contract without affecting its shape or structure

– Thicker gauge metal: In some cases, using a slightly thicker metal panel can add stiffness and help reduce how much the material warps or buckles

– High-temp underlayment: This layer goes under the panels and offers protection from moisture and heat. It also helps reduce wear caused by expansion

Beyond the original install, it’s smart to have regular checkups on your roof. A roofing pro can catch early signs of expansion trouble before anything leaks or comes loose. Small maintenance tasks, like tightening fasteners, sealing flashing, or replacing worn sealant, can go a long way. It’s easier and cheaper to adjust things early than to fix significant complications down the line.

Benefits Of Getting Expert Help

Dealing with metal roof expansion sounds simple on paper, but a quick fix rarely solves the problem. Because this issue deals with shifting materials, fasteners, sealants, and structure all at once, it takes knowledge and hands-on experience to address it the right way.

A trained roofing team knows how to inspect each part and identify what needs to be done. That includes checking the type of metal used, evaluating the amount of movement, and figuring out whether it’s a design issue or a maintenance one. In New Hampshire, where temperatures shift drastically between summer and winter, their insight matters.

Another advantage to working with the pros is that they’re familiar with area-specific concerns. Roofing materials have to stand up to humid summers and freezing winters. A contractor who works all year on homes across New Hampshire will know how to build something that handles both parts of the calendar. Whether it’s adjusting the pitch of the roof, selecting the right kind of fasteners, or installing venting that helps with airflow, those local details make a difference.

Trying to solve metal expansion yourself can lead to missed problems or even more damage. Hiring someone who’s trained means having peace of mind that the situation’s handled the first time. It’s a way to protect your time, your home, and your budget long term.

Keeping Your Metal Roof Resilient During Summer

By understanding how heat affects metal roofing, homeowners can take real steps to stay ahead of expansion problems. The mix of high temperatures and humidity during New Hampshire summers creates just the right recipe for metal panels to shift. That motion doesn’t always lead to trouble right away, but over time it can loosen parts, introduce gaps, and affect how your roof handles rain, wind, or insulation.

The best thing you can do is stay aware. If you spot buckling, gaps, or other signs we covered earlier, don’t wait. It’s always easier to handle these types of issues early than after a storm rolls through. With the right materials, thoughtful installation choices, and a little help from roofing pros who understand the weather patterns here, your metal roof can perform well for years, even through the hottest days of the year.

To make sure your metal roof handles the summer heat without trouble, consider professional solutions for residential roofing in New Hampshire. The team at J. Carnes & Son Roofing is here to help you protect your home with expert care, durable materials, and repairs that last through every season.

Why Your Rubber Roof Is Bubbling and What to Do About It

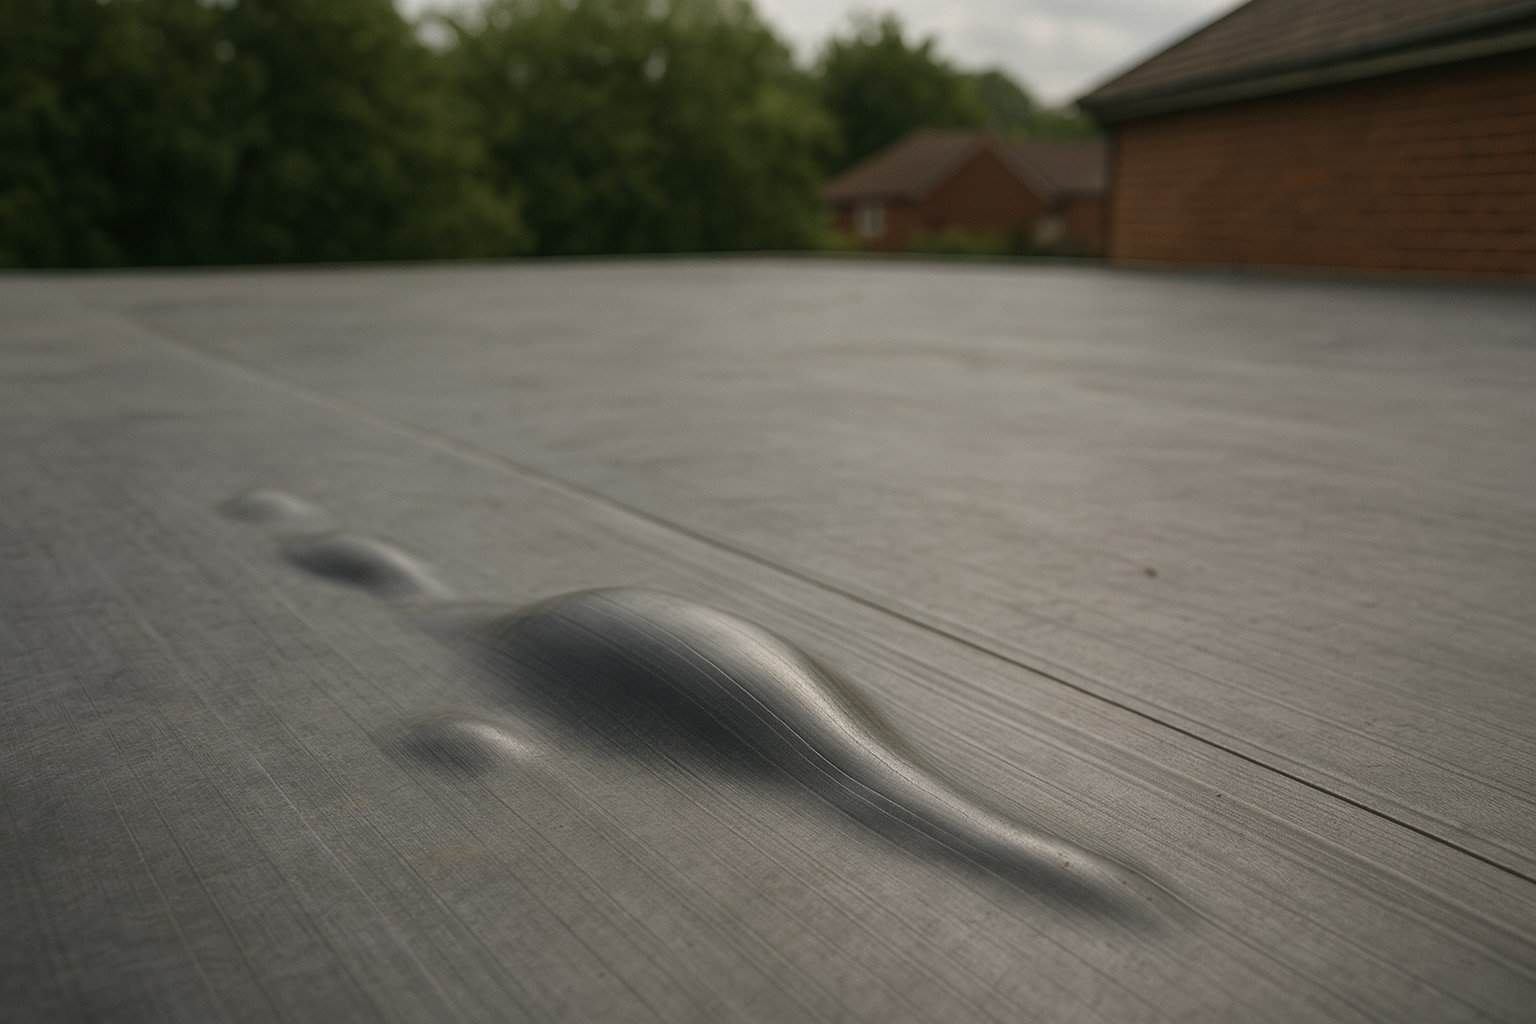
Rubber Roof Bubbles and Seam

Rubber roofing, especially EPDM, has grown in popularity for homes and low-slope structures. It handles New Hampshire’s changing seasons well, holds up against UV exposure, and offers solid durability. Rubber roofs are also lightweight and require less maintenance than many other materials. But despite how dependable they usually are, they can still run into problems when something goes wrong beneath the surface.

One of the more common issues homeowners report is bubbling. It might start as a small soft bump but can quickly grow beyond that if ignored. Some people notice bubbles forming during summer, especially after a series of hot days. Left unaddressed, these raised spots can allow water to pool or seep underneath, which gradually breaks down the roof’s surface and eventually leads to leaks or more serious damage. Understanding why rubber roofing bubbles in the first place is an important step toward catching it early and stopping it from spreading.

Common Causes Of Roof Bubbling

Bubbling might look harmless at first, but it typically signals a deeper issue with the roof’s underlying layers or how it was installed. Most bubbles form when air or moisture becomes trapped beneath the membrane, which then expands when heated. This problem often points to flaws in the way the roof was built or maintained.

Here are a few of the most common reasons rubber roofing starts to bubble:

– Poor installation: If the adhesive wasn’t applied evenly or the membrane wasn’t properly pressed down, bubbles may form over time. A rushed job or skipped steps during the install can come back to haunt you when summer heat kicks in.

– Trapped moisture: Any moisture left behind under the membrane during installation can eventually turn into vapor as temperatures warm up. This vapor can’t escape and instead pushes upward, creating soft bubbles on the roof’s surface.

– Inadequate ventilation: Homes and buildings need good airflow through the attic or crawl space to reduce heat buildup. Without it, pressure can rise under the roof and cause the material to lift or bubble over time.

An example we’ve run into in New Hampshire often occurs after an early spring warm-up. Snow might melt and leak into small openings or exposed areas along the structure. If this moisture gets underneath a poorly sealed rubber membrane, it may stay hidden until a hot July day causes it to heat up and form a visible bubble. Seasonal timing really does matter, especially when you’re dealing with roofs that have to handle snow, rain, heat, and long periods of direct sun.

If you’re seeing bubbles or lifted areas, it’s a sign something’s wrong with how the roof is sealed or vented.

How To Identify Bubbling In Your Rubber Roof

Some roof issues require climbing up and taking a close look, but bubbling is usually something you can spot from the ground or a second-story window, especially on wide, flat surfaces. Still, a clearer inspection will help you know how bad the problem is and whether it’s spreading to other parts of the roof.

Here’s what to look for:

– Round, raised portions of your roof that feel soft or spongey when lightly pressed

– Discoloration around bubbled spots indicating trapped moisture

– Areas that look or feel uneven compared to surrounding roofing

– Pools of standing water that tend to gather near these bubbles

If you’re unsure whether what you’re looking at is bubbling or something else, a roofing pro can use testing tools or a moisture scanner to confirm it. It also helps to check the same areas a few times a year. Bubbles can change shape or grow much faster than expected depending on temperature swings. Regular inspections, especially right before and after the heavy rain season, help catch these errors early and prevent more costly problems later.

Steps To Address And Prevent Roof Bubbling

If you spot bubbling on your rubber roof, it’s best to get it checked out soon. While it may not seem urgent at first, roof damage tends to get worse over time. If moisture finds a path into your home or slowly breaks down the adhesive, you’ll have a larger, more expensive repair on your hands.

Here’s how to deal with roof bubbling the right way:

1. Don’t ignore it

Light bubbling might look minor, but it can spread or hide other roof problems underneath. Even a smaller bubble can indicate trapped air or water, which means the membrane isn’t fully sealed anymore.

2. Get a professional inspection

Roofing professionals will know how to safely walk on a membrane roof and check for weak spots, damage, or signs of water intrusion. They can also confirm if your bubbling issue is surface-level or if repairs to the insulation layer are needed too.

3. Repair or re-seal the affected zones

Once the area is assessed, the repair could involve cutting out the bubble, removing any moisture, and patching it up with fresh rubber material and adhesive. If the bubbling is widespread, a larger portion of the roof may need to be re-sealed.

4. Keep up with regular maintenance

Annual checks, especially before and after heavy snow or rainy seasons, can catch problem areas early. Removing debris, inspecting flashing, and checking roof edges makes sure water can’t sneak underneath the membrane.

5. Make sure the roof has proper ventilation

Adequate airflow helps prevent heat buildup and reduces the chances of vapor forming beneath the surface. Rooms directly under flat or low-slope rubber roofs benefit from having good attic or ceiling-level venting, especially during hot New Hampshire summers.

Whatever the repair approach, bubbling on rubber roofing is a sign to act. Leaving it for later isn’t worth the risk.

Why Professional Roofing Services In NH Make A Difference

Rubber roofs have their specific quirks. They don’t behave the same way asphalt shingles or metal roofing systems do, especially when it comes to how they expand, contract, and breathe with temperature shifts. That’s why working with roofing professionals who truly understand these systems makes all the difference.

In New Hampshire, the weather can flip between heavy snowfall in winter and high humidity by mid-summer. That kind of range puts stress on low-slope roofing, which is where rubber roofing is most commonly installed. When professionals handle the project from the start, they factor in the insulation needs, drainage layout, and even sun exposure. These details keep the roof functioning at its best for years.

Roofing teams also bring the tools and materials needed to repair or replace affected sections correctly. They follow safety protocols, check the structure carefully, and know how to install layers properly so that bubbling doesn’t reappear. Local pros also understand building codes and how moisture moves in regional homes, which might look different from practices in other states.

Choosing a roofing service based in New Hampshire gives you peace of mind, knowing the team is used to working in the same seasonal cycles you’re dealing with. They’ll be able to spot red flags you might overlook and help protect homes from some of the unique conditions rubber roofing in this area can face.

How to Keep Your Roof Performing Year After Year

Rubber roofs are a great option for homes in New Hampshire thanks to their flexibility and long lifespan, but they’re not something you can just forget about entirely. Spotting bubbling before it turns into something bigger can protect your home from leaks, mold, or even full roof replacements down the line. Watching for changes in how your roof looks and feels is one of the easiest ways to keep things in check.

Taking care of a rubber roof doesn’t require constant attention, but it does need the right kind of attention. Whether that’s scheduling regular inspections or working with someone who knows what to look for, staying on top of issues like bubbling can stretch the number of years your roof performs at its full potential. For homeowners in New Hampshire, where heat and cold both test the durability of materials, it’s all about keeping your roof ready for what’s coming next.

Rubber roofing needs smart care to handle the shifts in New Hampshire weather all year long. If you’ve seen bubbling or areas that look uneven, it’s a good time to have it looked at by someone who knows what they’re doing. Getting help from professional roofing services in NH can make all the difference when it comes to lasting performance and peace of mind. Let J. Carnes & Son Roofing help you keep your roof strong and ready for whatever the seasons bring.